The other day, I was on the phone with my parents, when they asked me about some photos I posted on Instagram. They were color 35mm film photos that I shot, developed, and digitized myself in my living room and garage.
“They didn’t turn out exactly how I wanted them too, but they’re still cool and I’m still learning,” I said. My dad asked me what I thought went wrong. I thought about it for a minute, and then told him that some of the photos were blurrier than I was anticipating, and that, for any given photo, maybe it was an issue with my light metering and camera settings, or the camera’s focus. Then I thought about it for a second. Maybe it was an issue with the temperature of the chemicals I used to develop the film, or the number of times I’d previously used the chemicals, or how much and how often I’d agitated them while I was developing them. Maybe it was an issue with my negative scanning setup, which has many of its own little things that can affect the quality of the photo. Or, possibly, it was an issue with how I digitized them, the settings on the software I used, or the way I (didn’t) edit them in Lightroom after the fact. “So, I guess it could be anything,” I said.
Such is the joy of shooting, developing, and digitizing my own color film, a hobby I’ve just started but very much enjoy and one where lots of things can and inevitably do go wrong. Soon after we launched 404 Media, I wrote an article about how much I was enjoying getting into film photography, a hobby that has made me consider each photo I take because it is expensive relative to taking 5,000 photos of the same thing on an iPhone and whose charm comes in part because of the inherent delayed gratification and imperfections that come with the medium. In part because of the cost and in part because of the incredible magic I am about to explain, I decided to not only take film photos, but to develop, process, and scan the negatives myself, a sort of secondary hobby that has introduced innumerable new frustrations, joys, and seeming randomness to my new hobby.
There are many good guides to developing film at home; this isn’t going to be one of them, exactly. But I am going to explain my setup, what I use, how I do it, and get into the fact that I essentially have absolutely no idea what I am doing but am enjoying the process nonetheless.
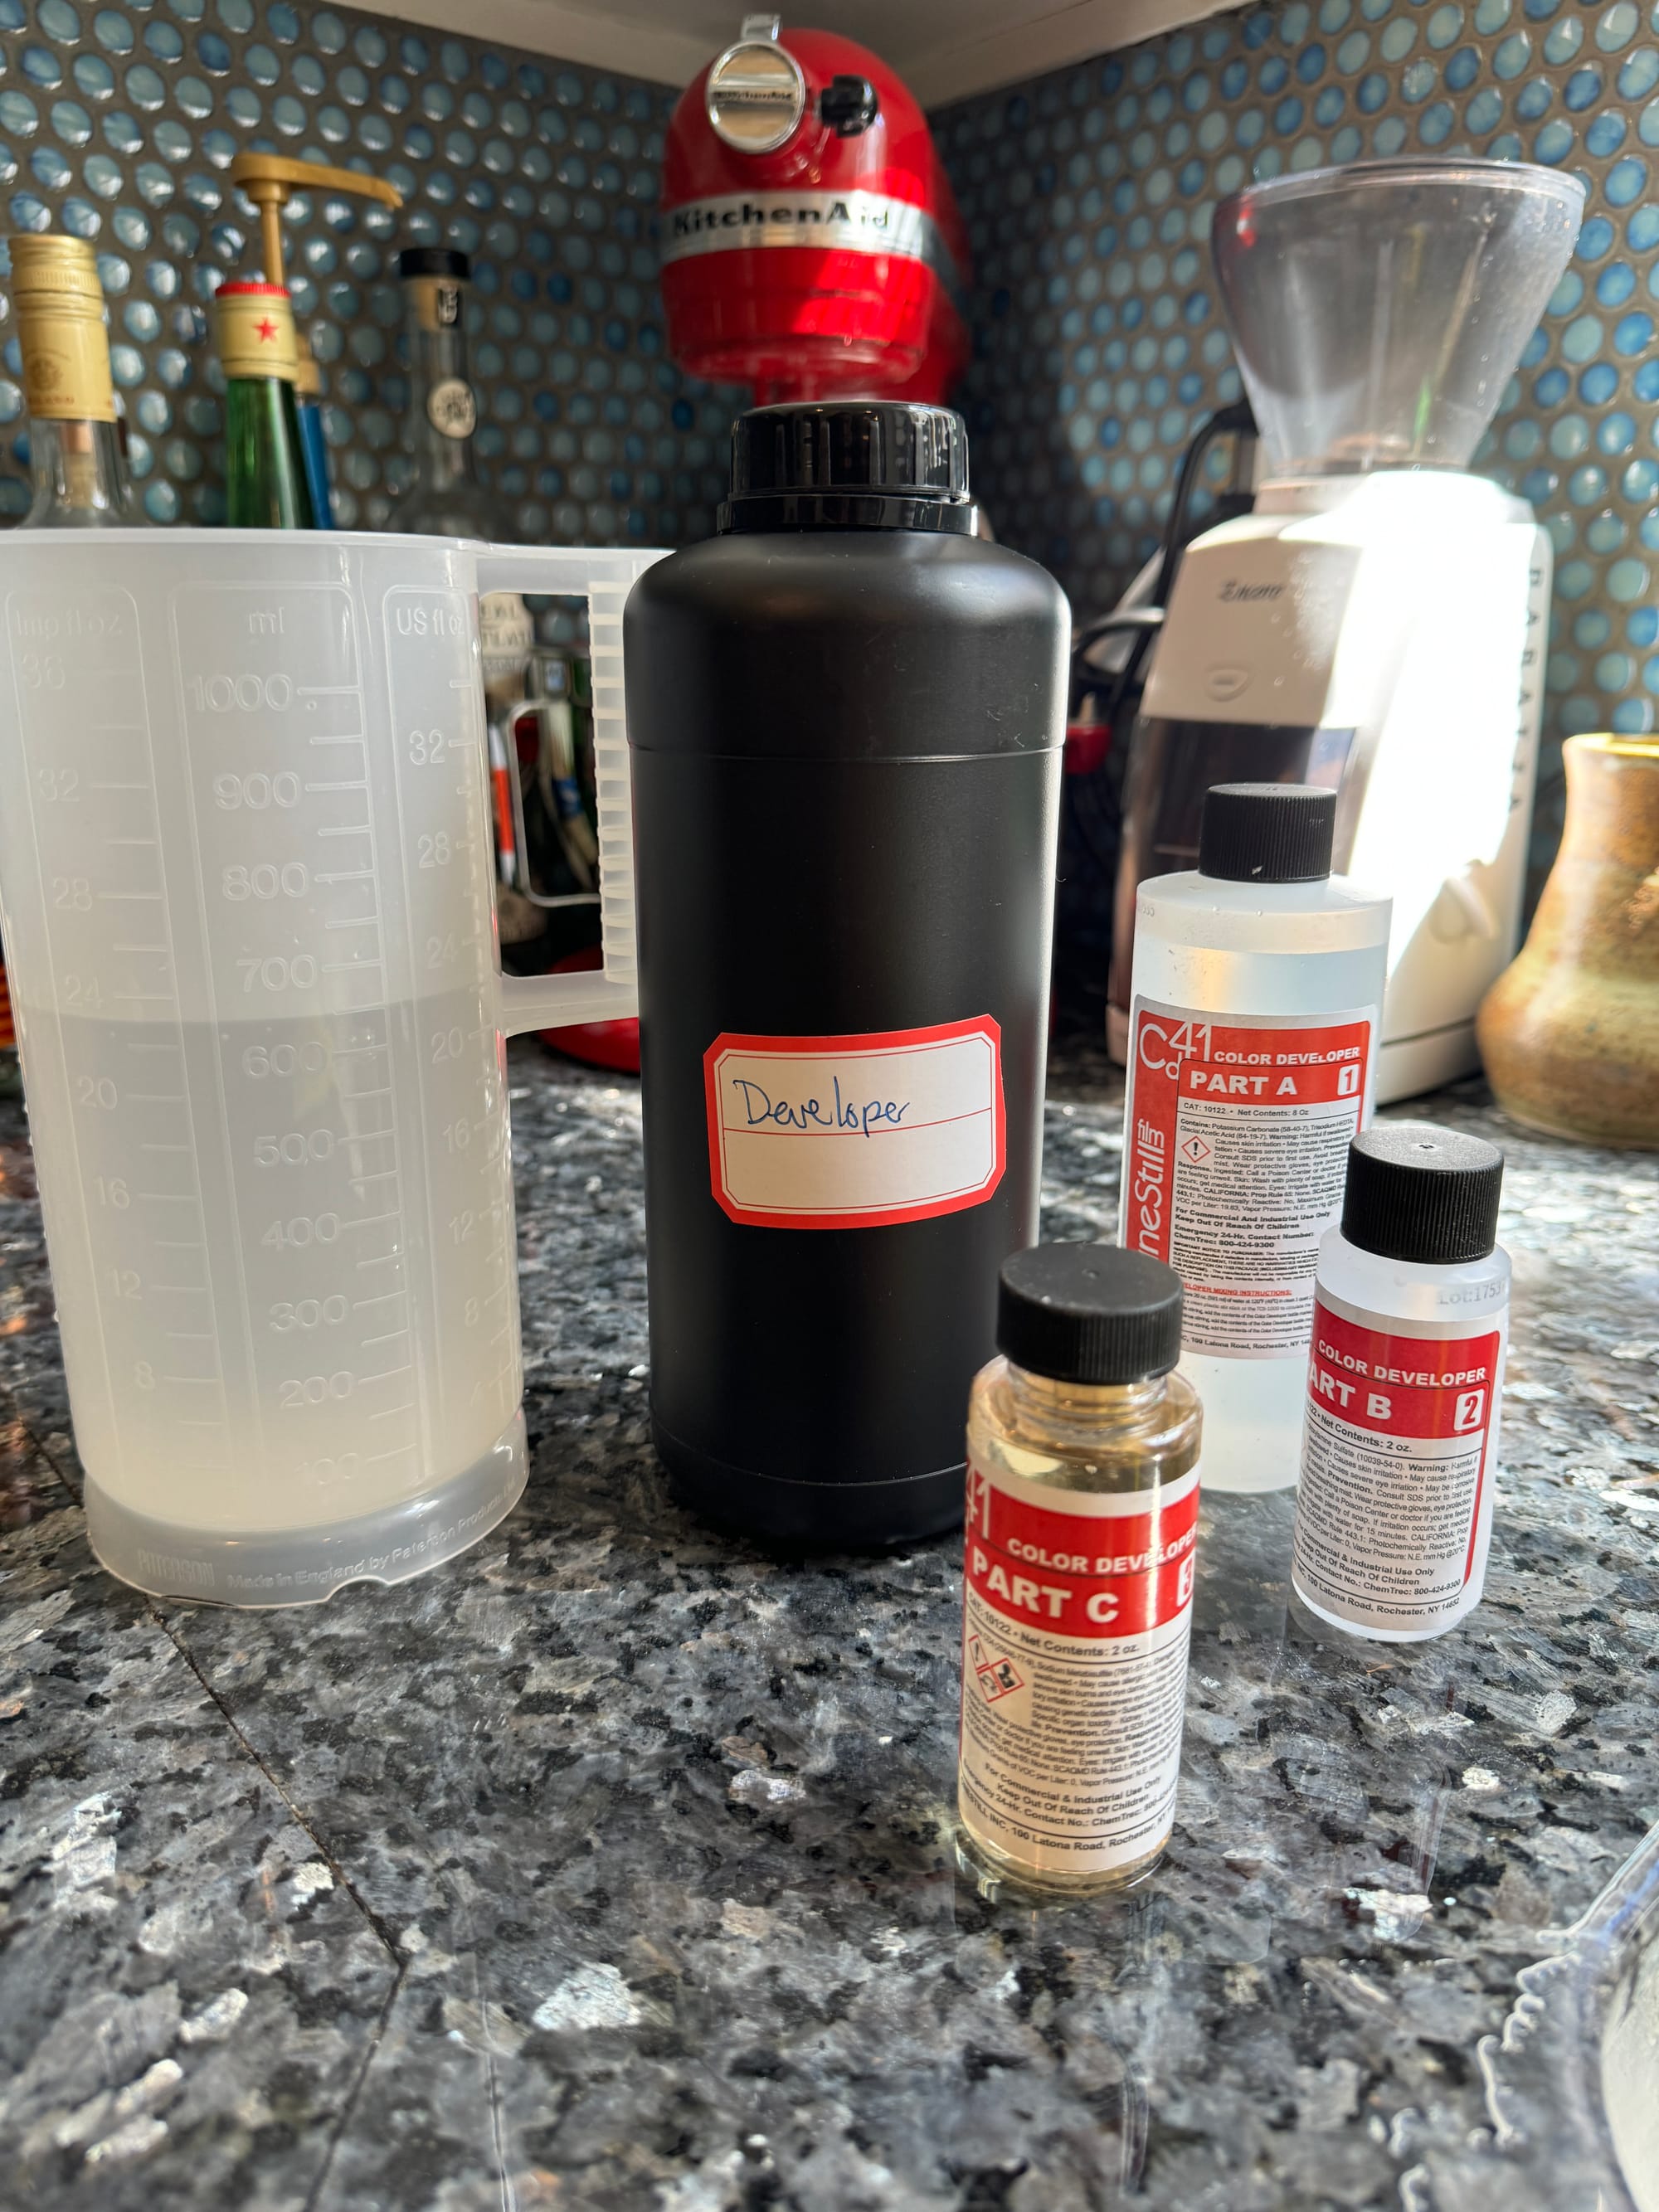

Various developing chemicals and supplies
The Why
I originally convinced myself to do this because I thought that I would save tons of money, and, if I keep it up, that will eventually be true. The least expensive film processing and scanning I have found in Los Angeles is about $15 per roll. Film costs roughly $10 per roll, and has 36 exposures. This means it costs $25 a roll for 36 pictures, or 69.4 cents per photo (nice?). Color film developing chemicals cost $30 and can theoretically process 24 rolls of film give-or-take. This means it costs $1.25 per roll. Factoring in the cost of film, this means it costs something like 31 cents per photo which is theoretically quite a bit of savings.
As I began researching this part of the hobby, though, I actually got more caught up in both the artistry of it and more importantly all of the various gadgets I could purchase and justify under the auspices of saving myself lots of money in the long run. I simply got very excited at the prospect and idea of putting a physical object (film) into an old camera, exposing that film to light, then using some sort of chemical wizardry in my garage to turn that film into pictures using a process that has been honed over many decades. The mechanical, chemical, and analog nature of the whole thing was very alluring to me as someone who spends the vast majority of my waking hours staring at internet-connected rectangles. I felt, and still feel, that the photos I have shot, developed, and scanned myself are more sentimentally valuable than anything I’ve done with my iPhone or a digital camera, and that they are something I truly “made” with love and care. Anyways.
Developing Setup
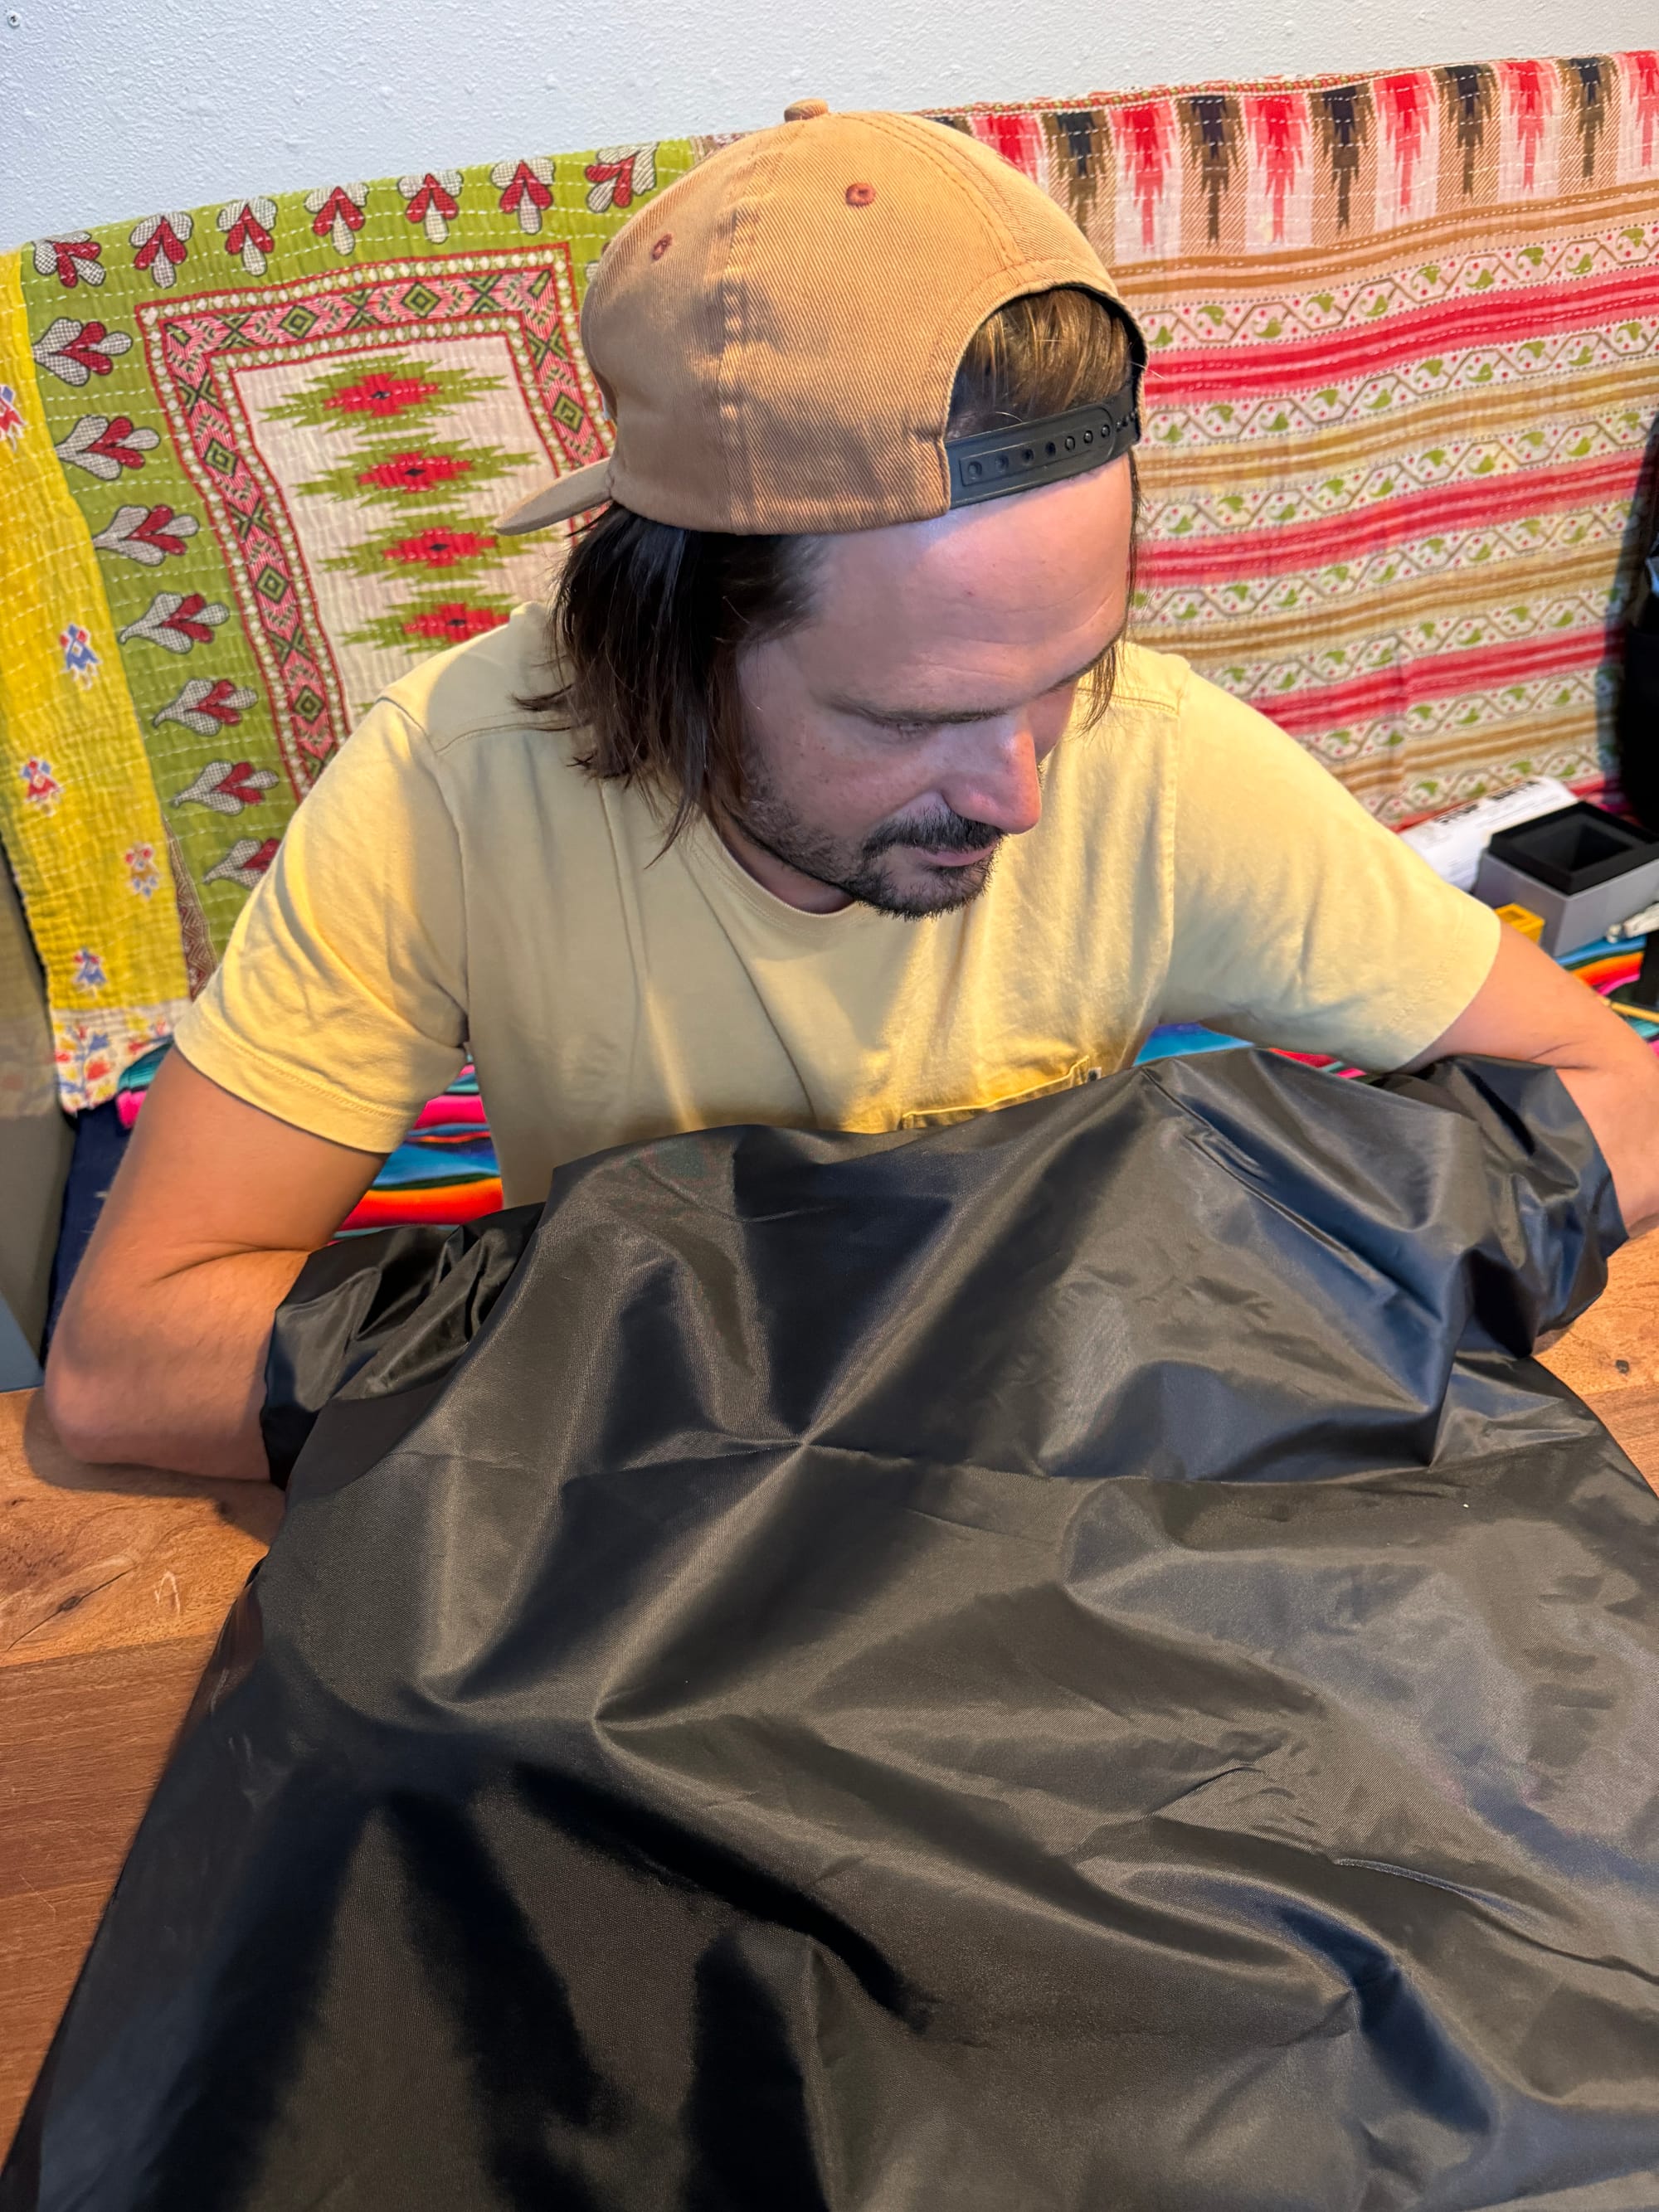
Changing Bag: Contrary to the belief of everyone I have told I am doing this, you do not need a “darkroom” to develop photos, because geniuses have invented something called a “changing bag,” which is a black bag inside another black bag, each of which have zippers that prevent light from entering. This bag also has armholes that are held closed with elastic where your arms go in. This creates a miniature “darkroom” where you do all the stuff you’d need to do in a darkroom, without being able to see anything (more on this in a moment).
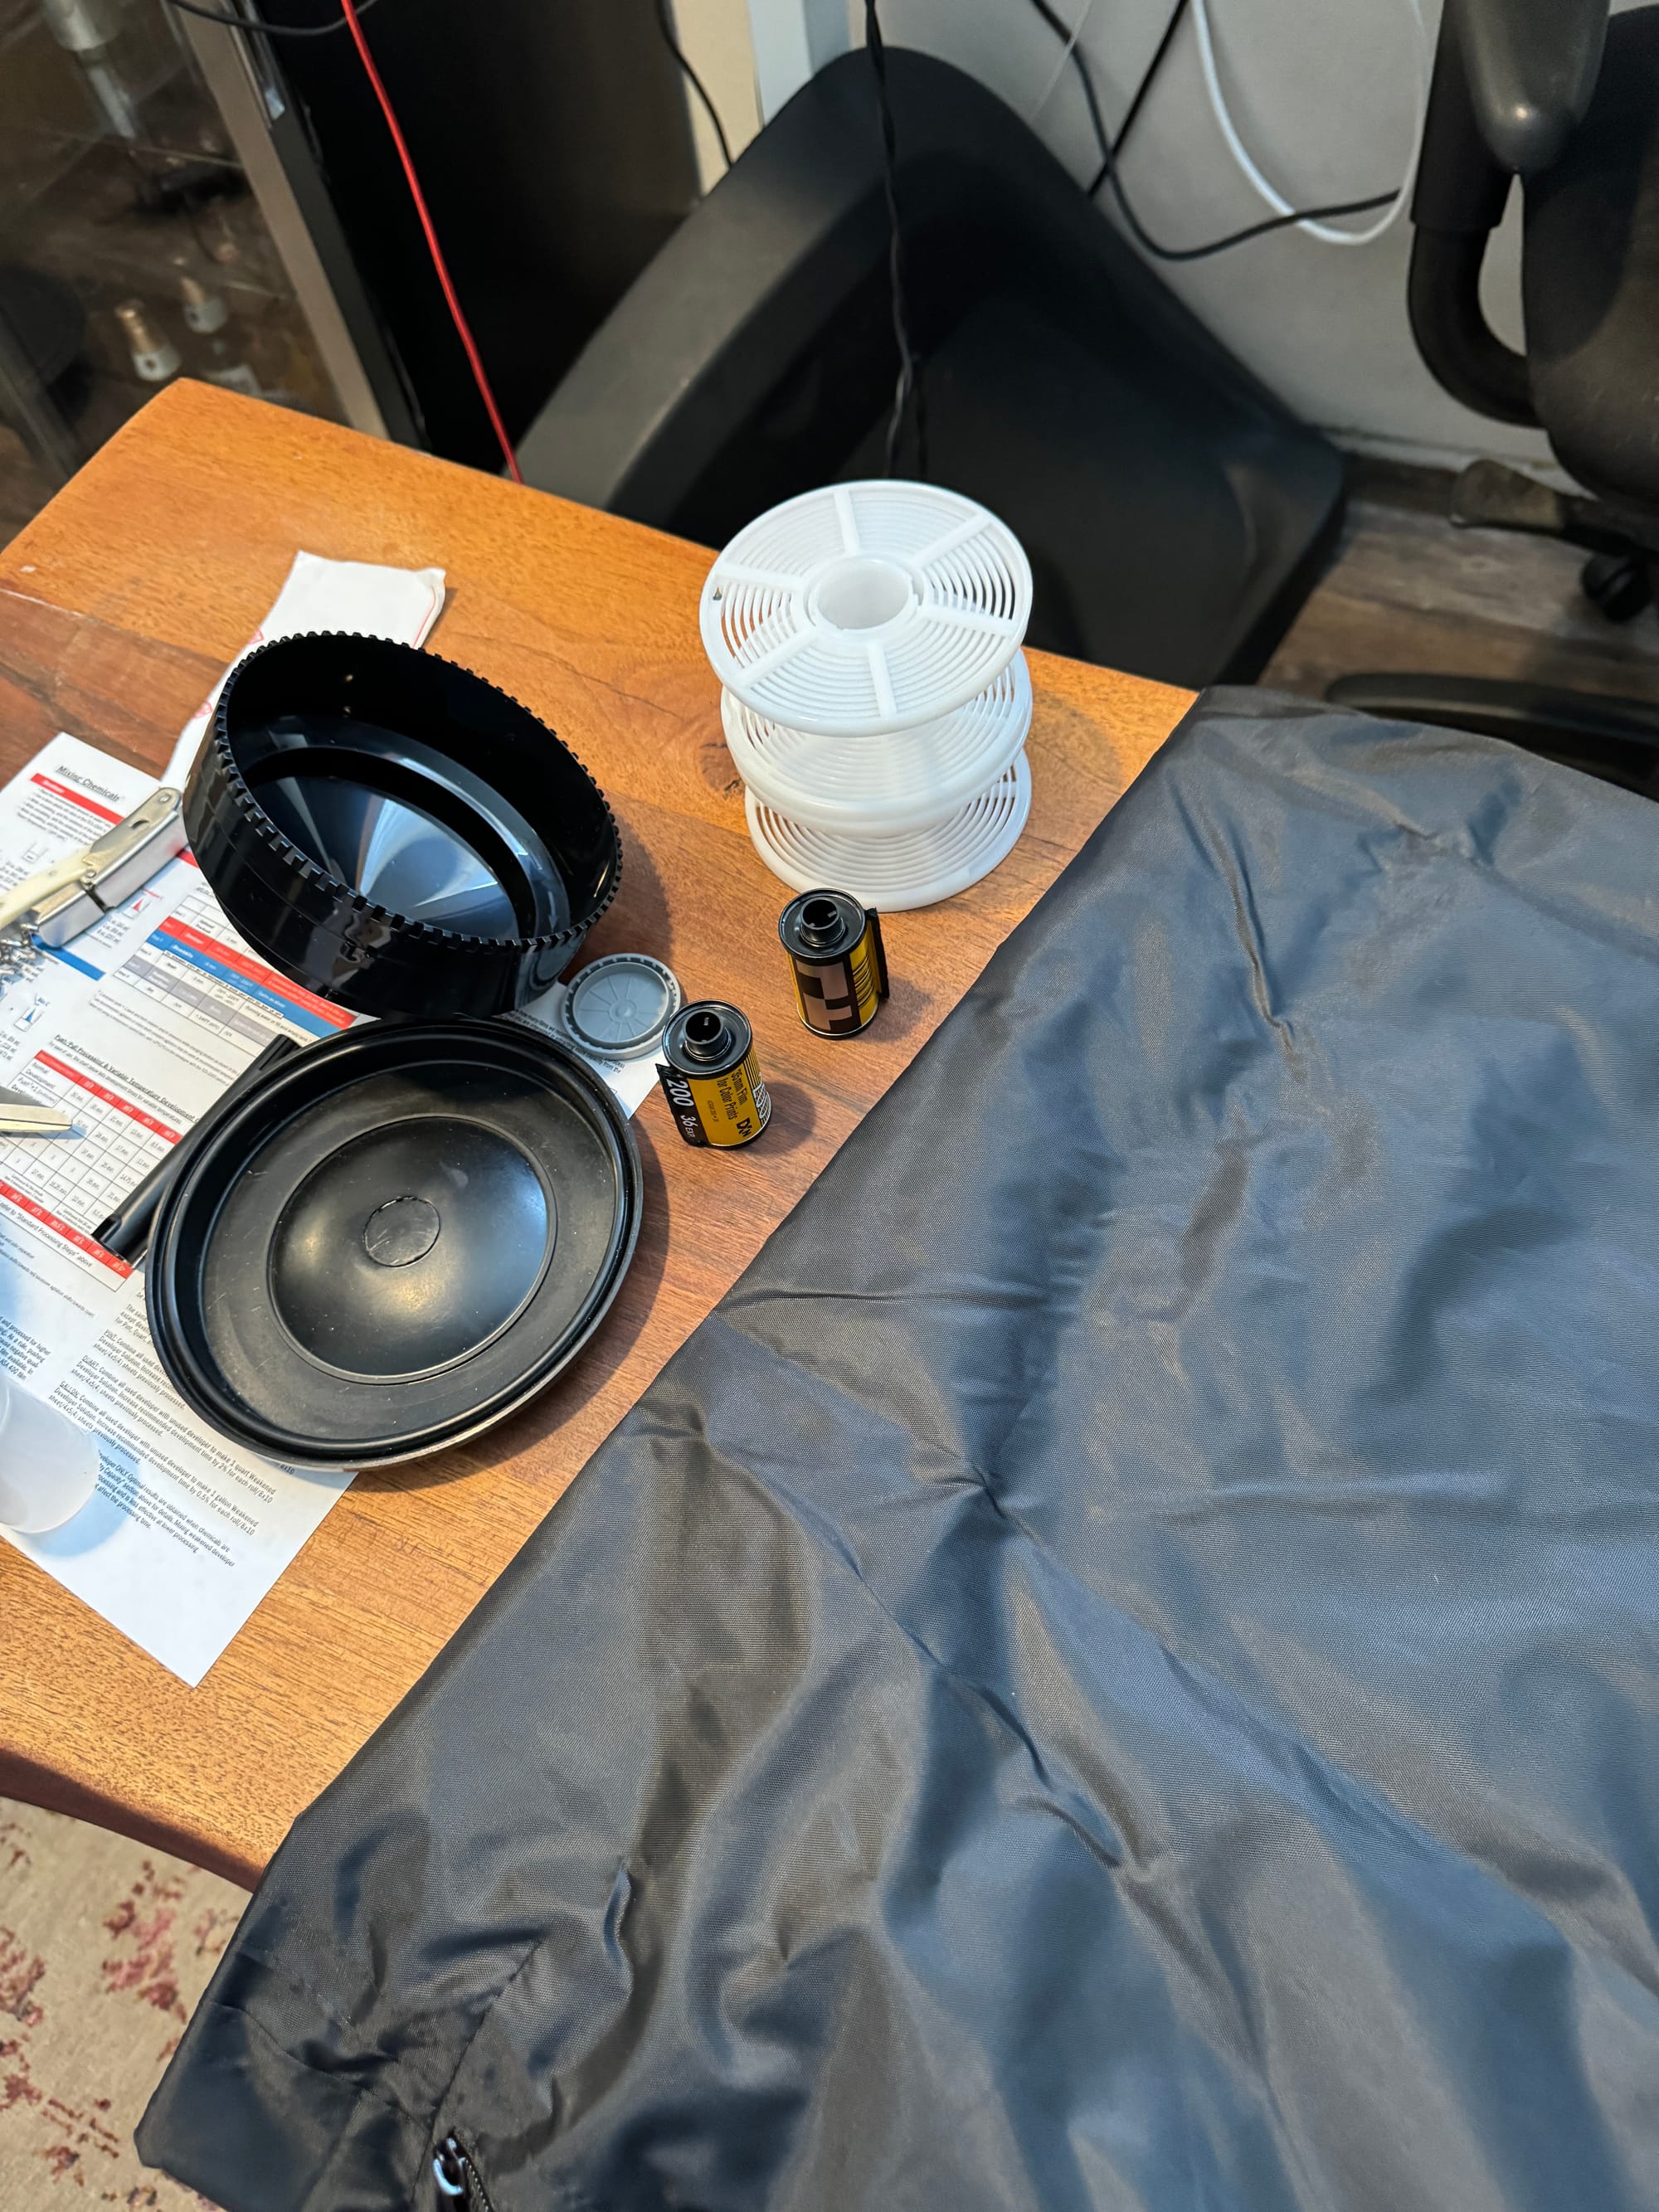
Developing Tank: This is a lightproof tank that you do the developing in. It has a bunch of little pieces, but the major ones are a plastic (or stainless steel) reel, which I have grown to hate more than any other inanimate object in my life. I have a Patterson one, which seems to be the most common for amateurs. It costs like $35.
Bottle Opener: Any will do
Scissors: Any will do
Chemicals: The aforementioned chemicals cost about $30 and thankfully come with very specific instructions. You can buy powdered or liquid chemicals; either way you are going to end up having to mix them yourself with water, which is an easy process.
Chemical bottles: The chemicals denature quickly when exposed to light or air so you should get black bottles, and you should squeeze the air out of them when you are done. There are lots of them and I bought some for $10 on eBay.
Sous Vide: I very quickly learned that it is very important to keep the chemicals at a specific temperature (102 degrees F) while you’re processing the film. Film developing companies sell expensive chemical heaters which I believe are very similar to sous vides and a sous vide also works fine. You put the chemicals in a water bath, set the water bath to 102 degrees, and make sure they’re heated to that temperature while you develop the film. My friend gave me a sous vide because he never used it, which is one of the many justifications I made to myself about why I had to do this.
Thermometer: Meat thermometer works
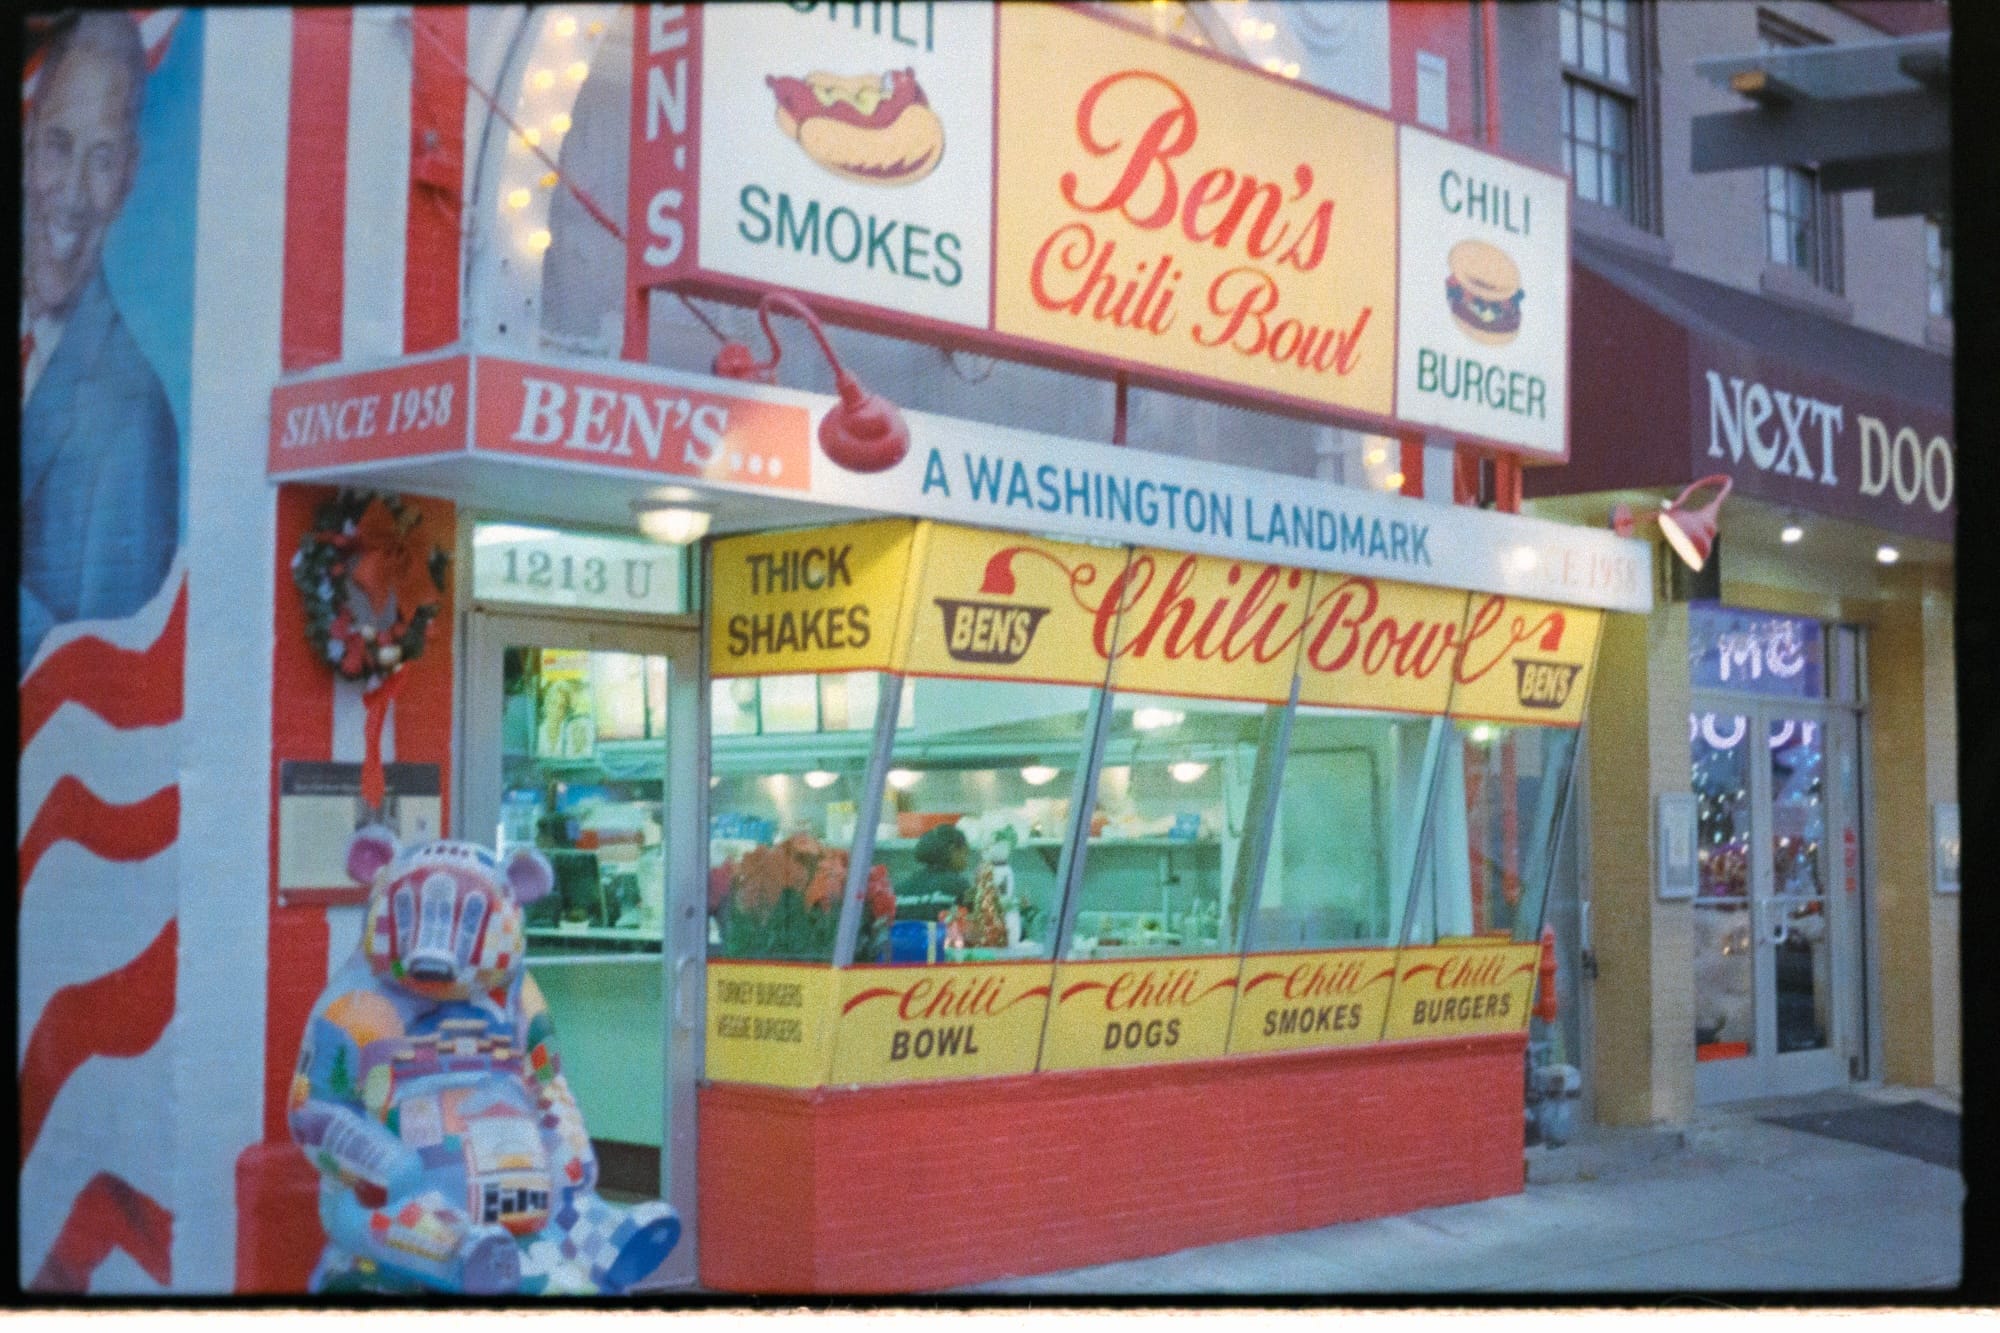

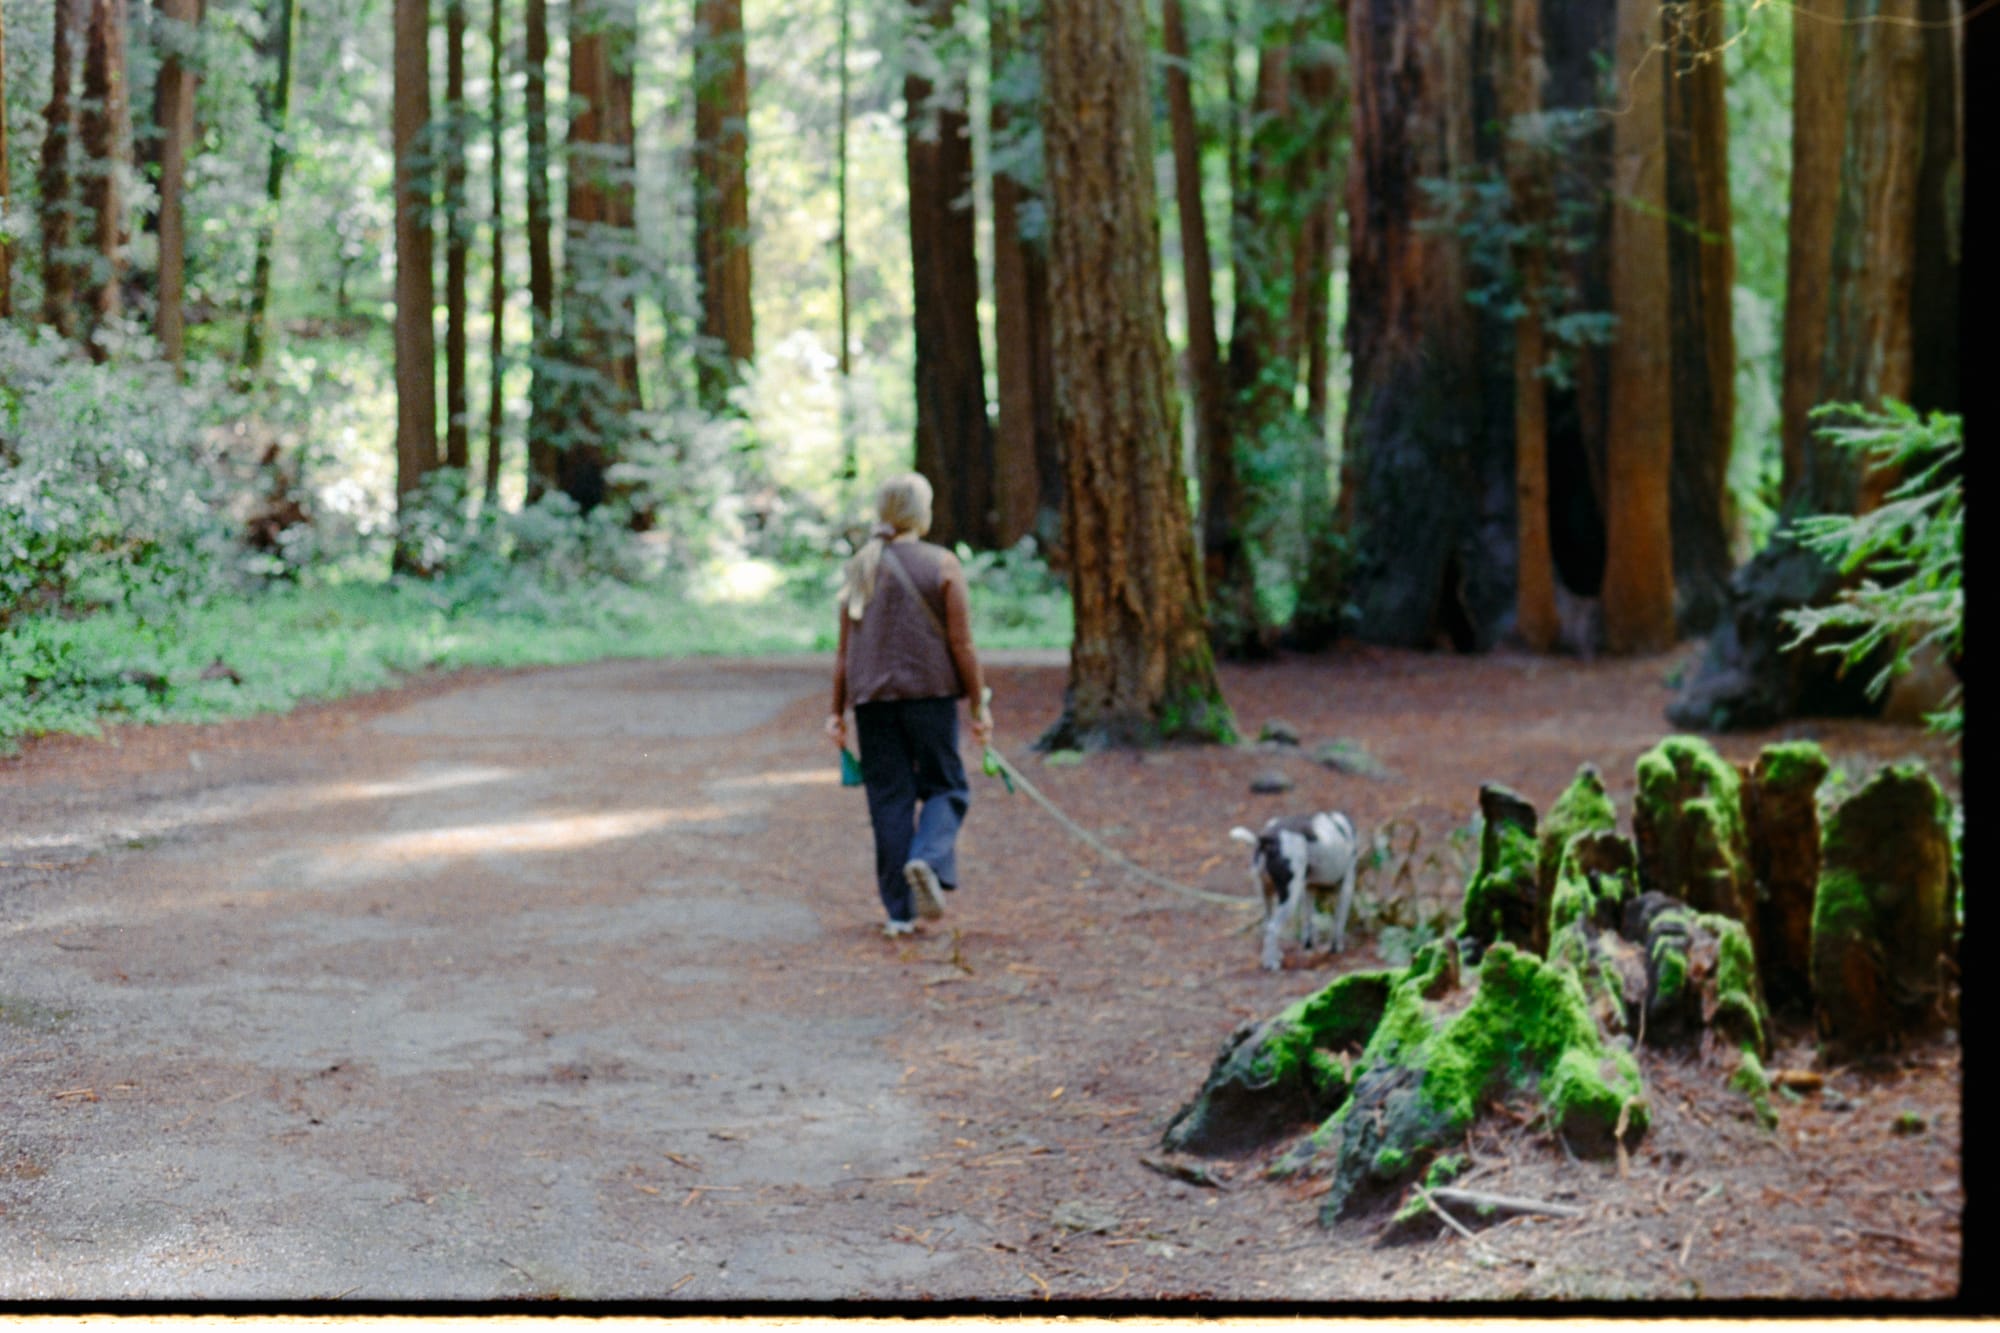
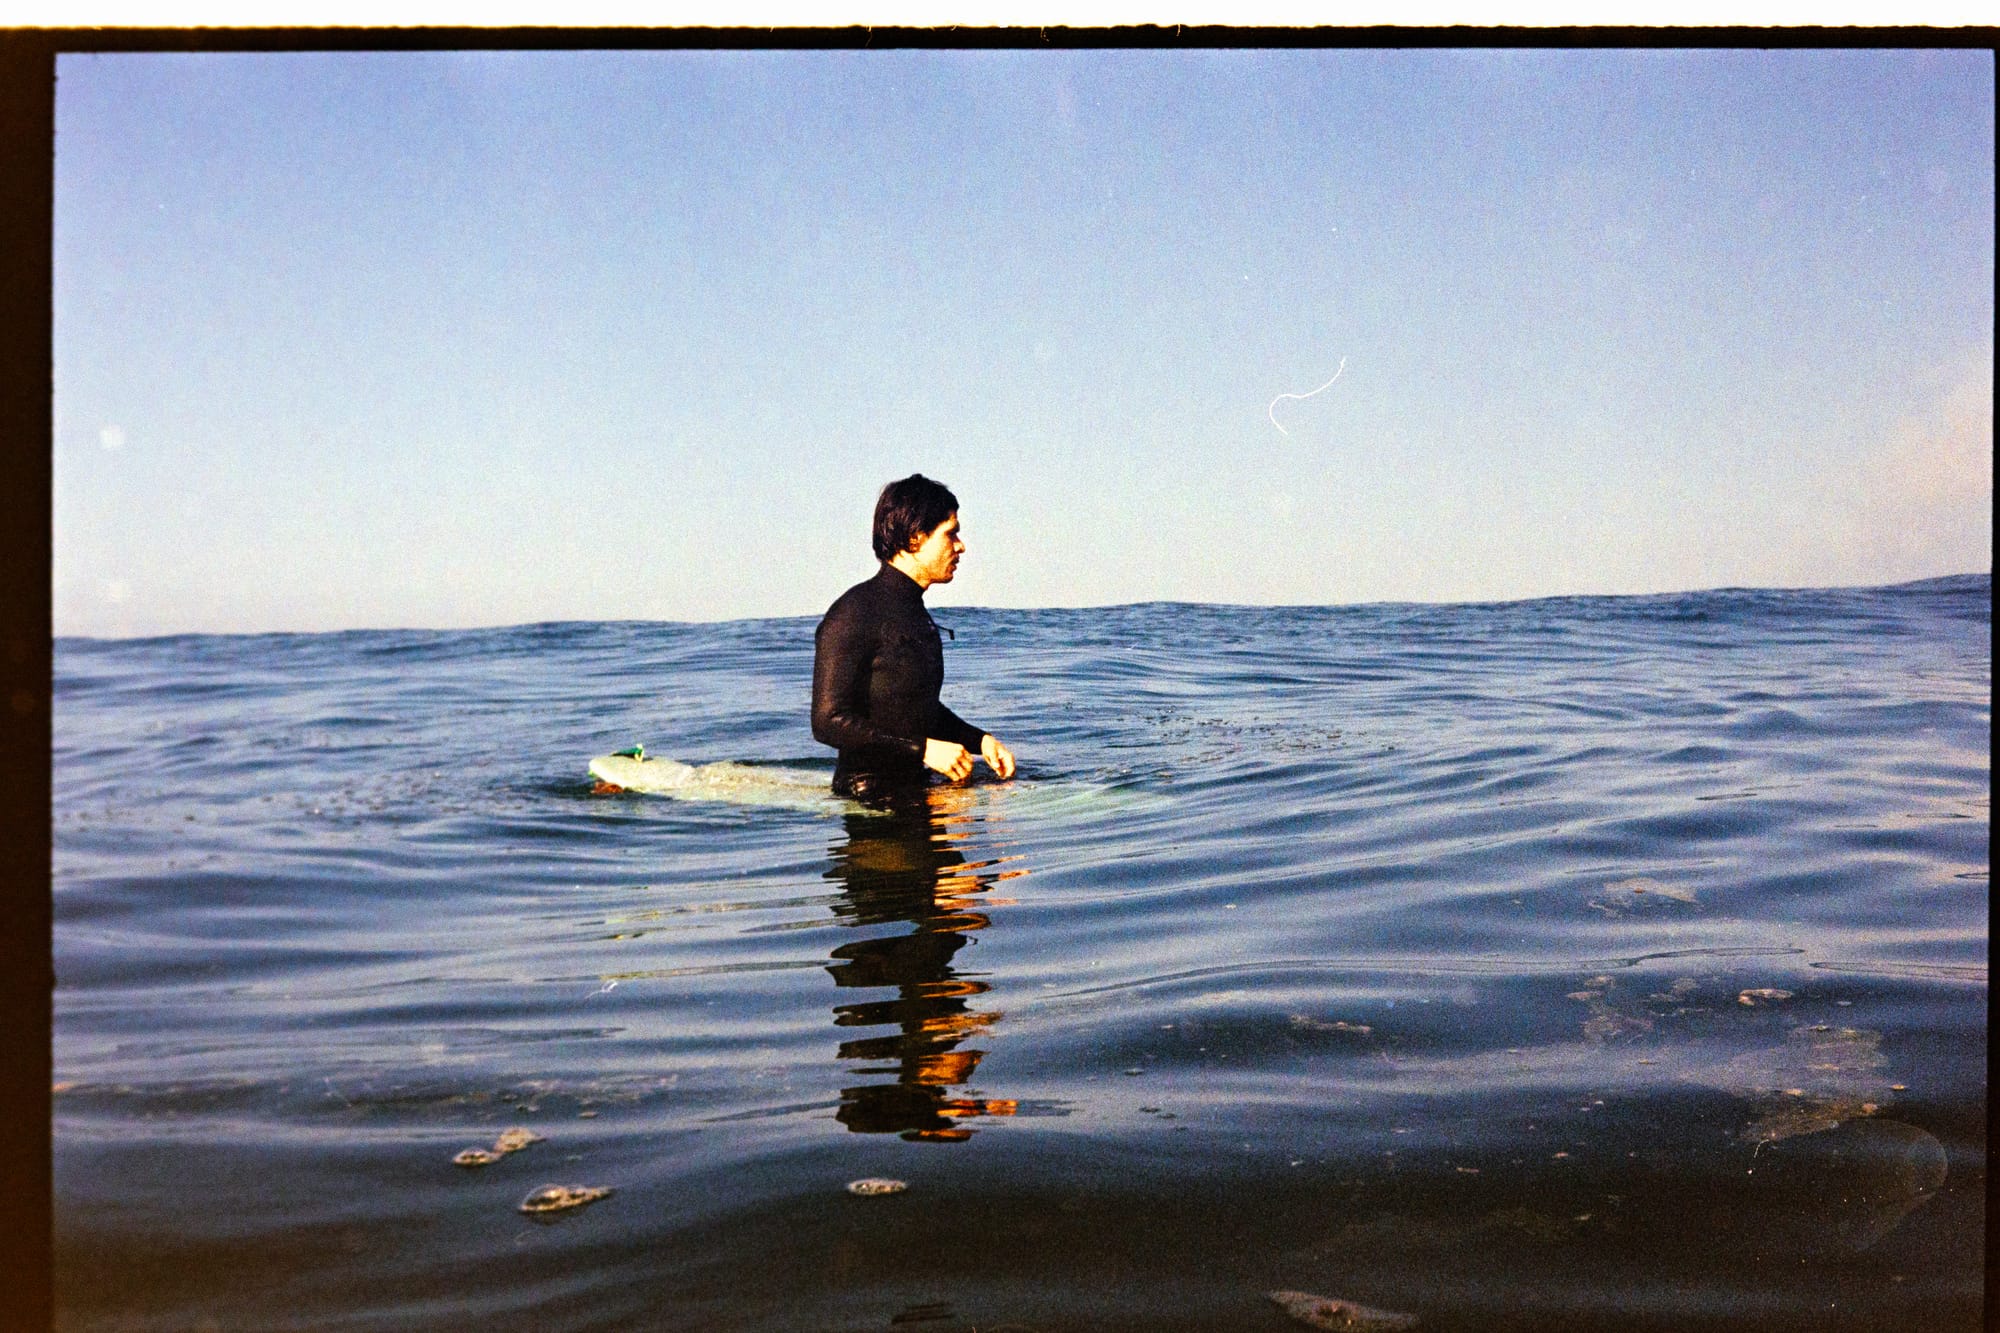
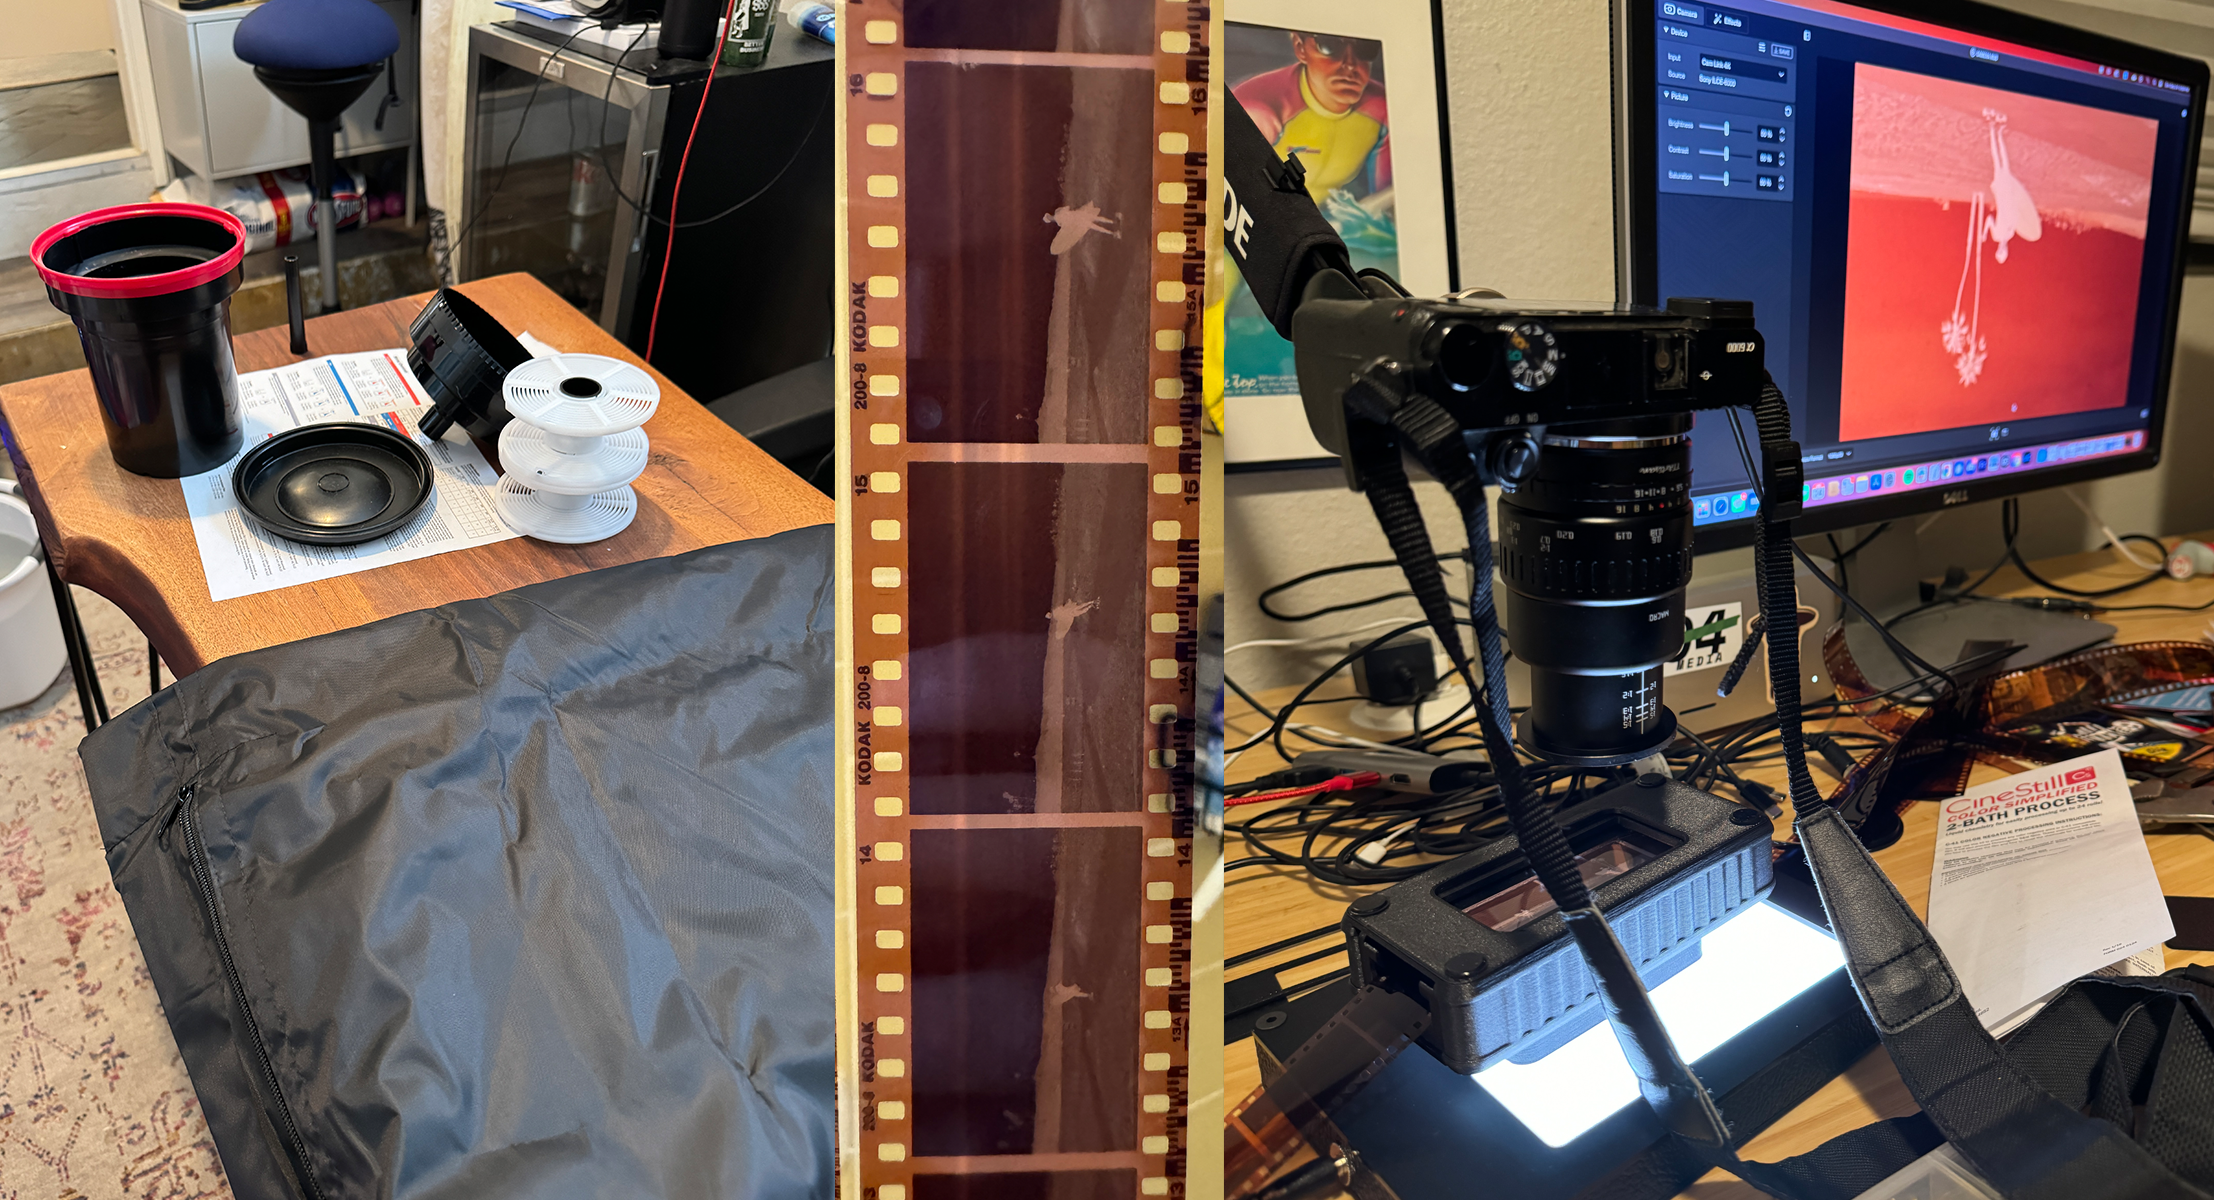
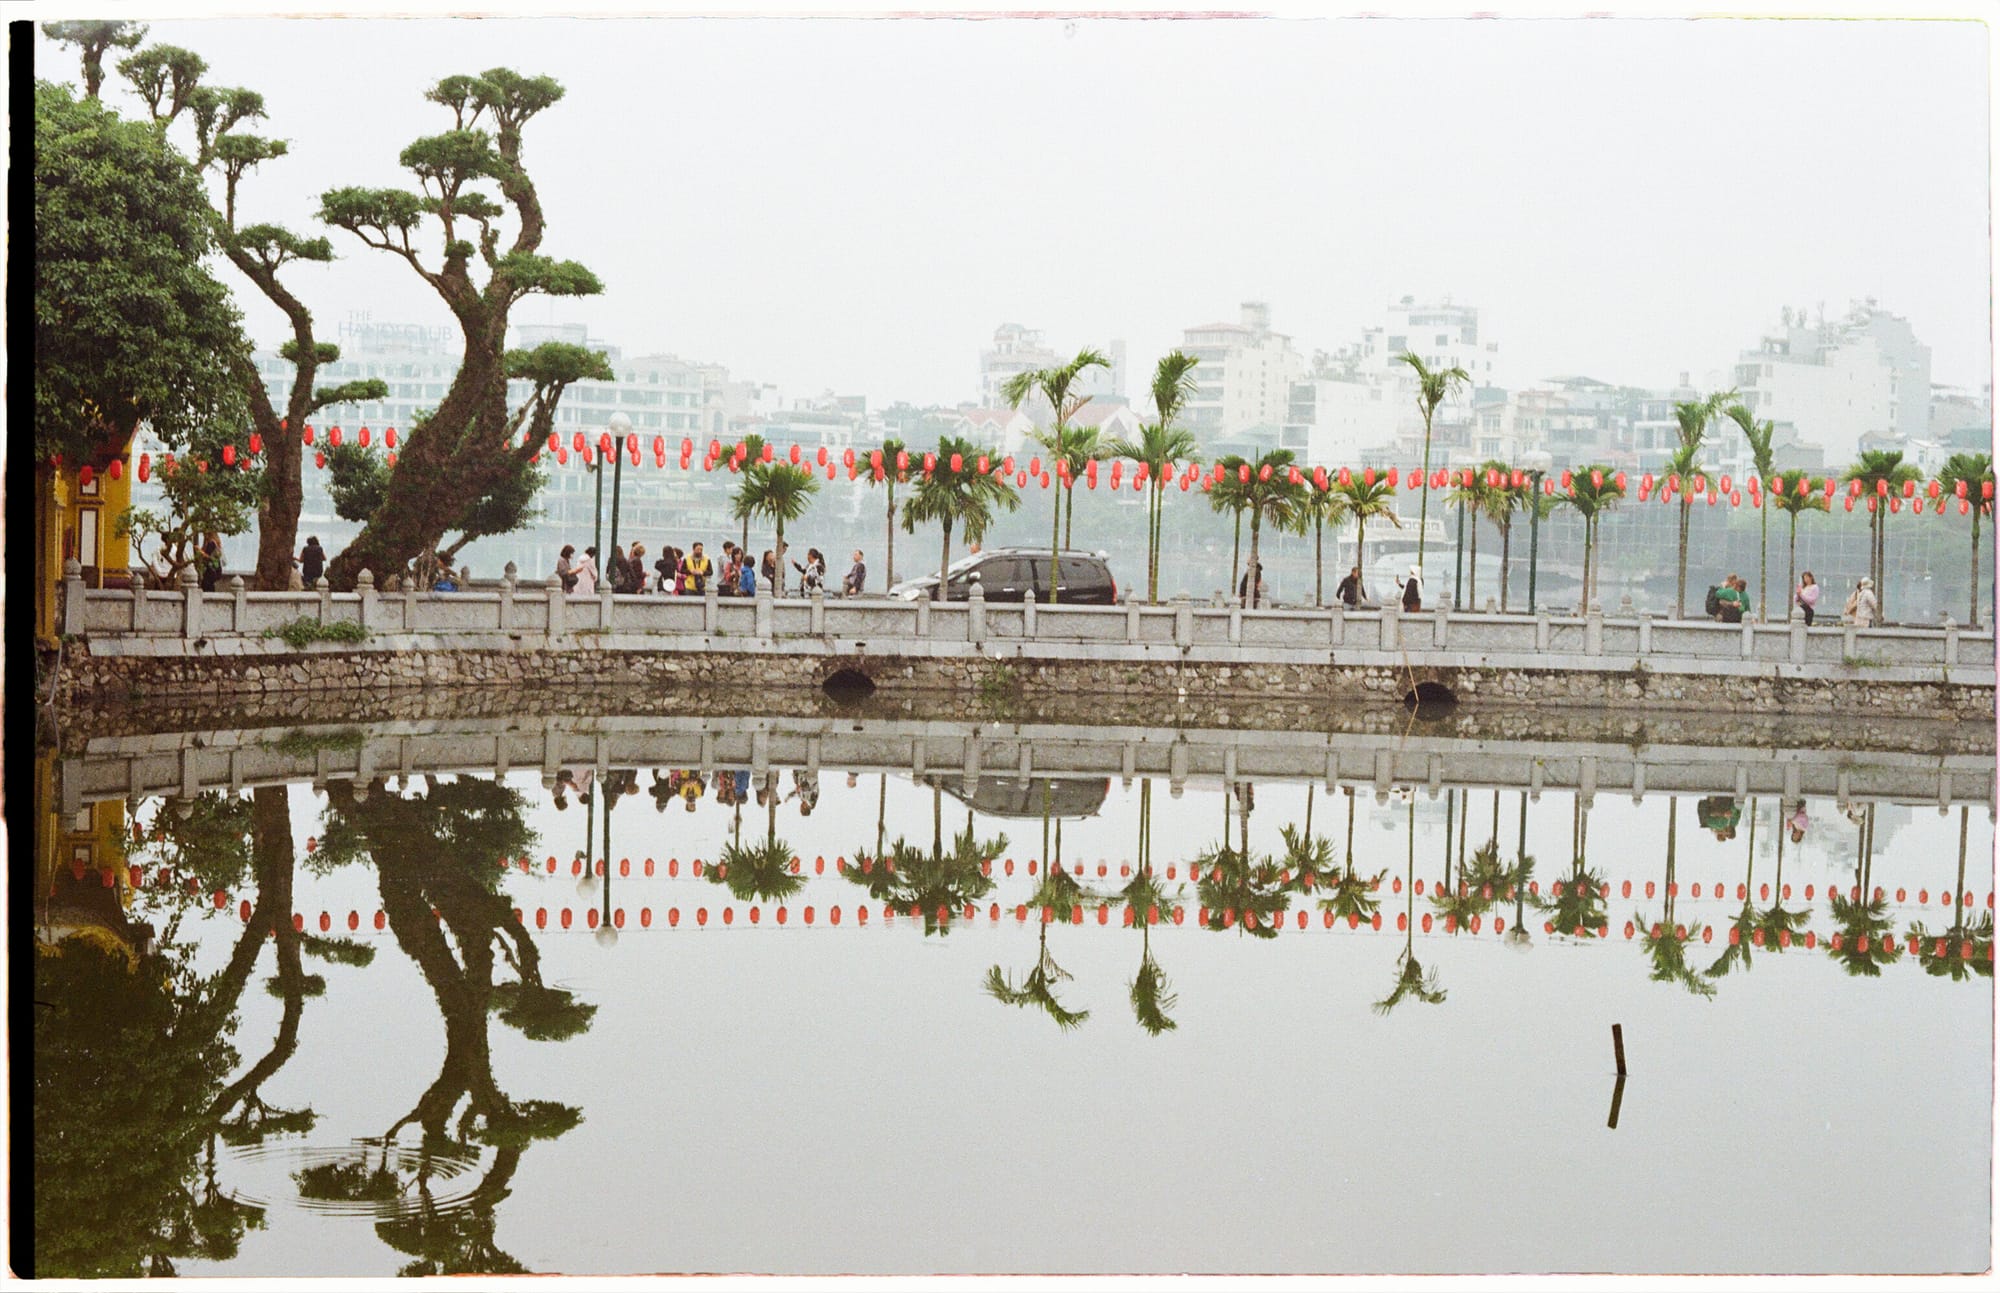
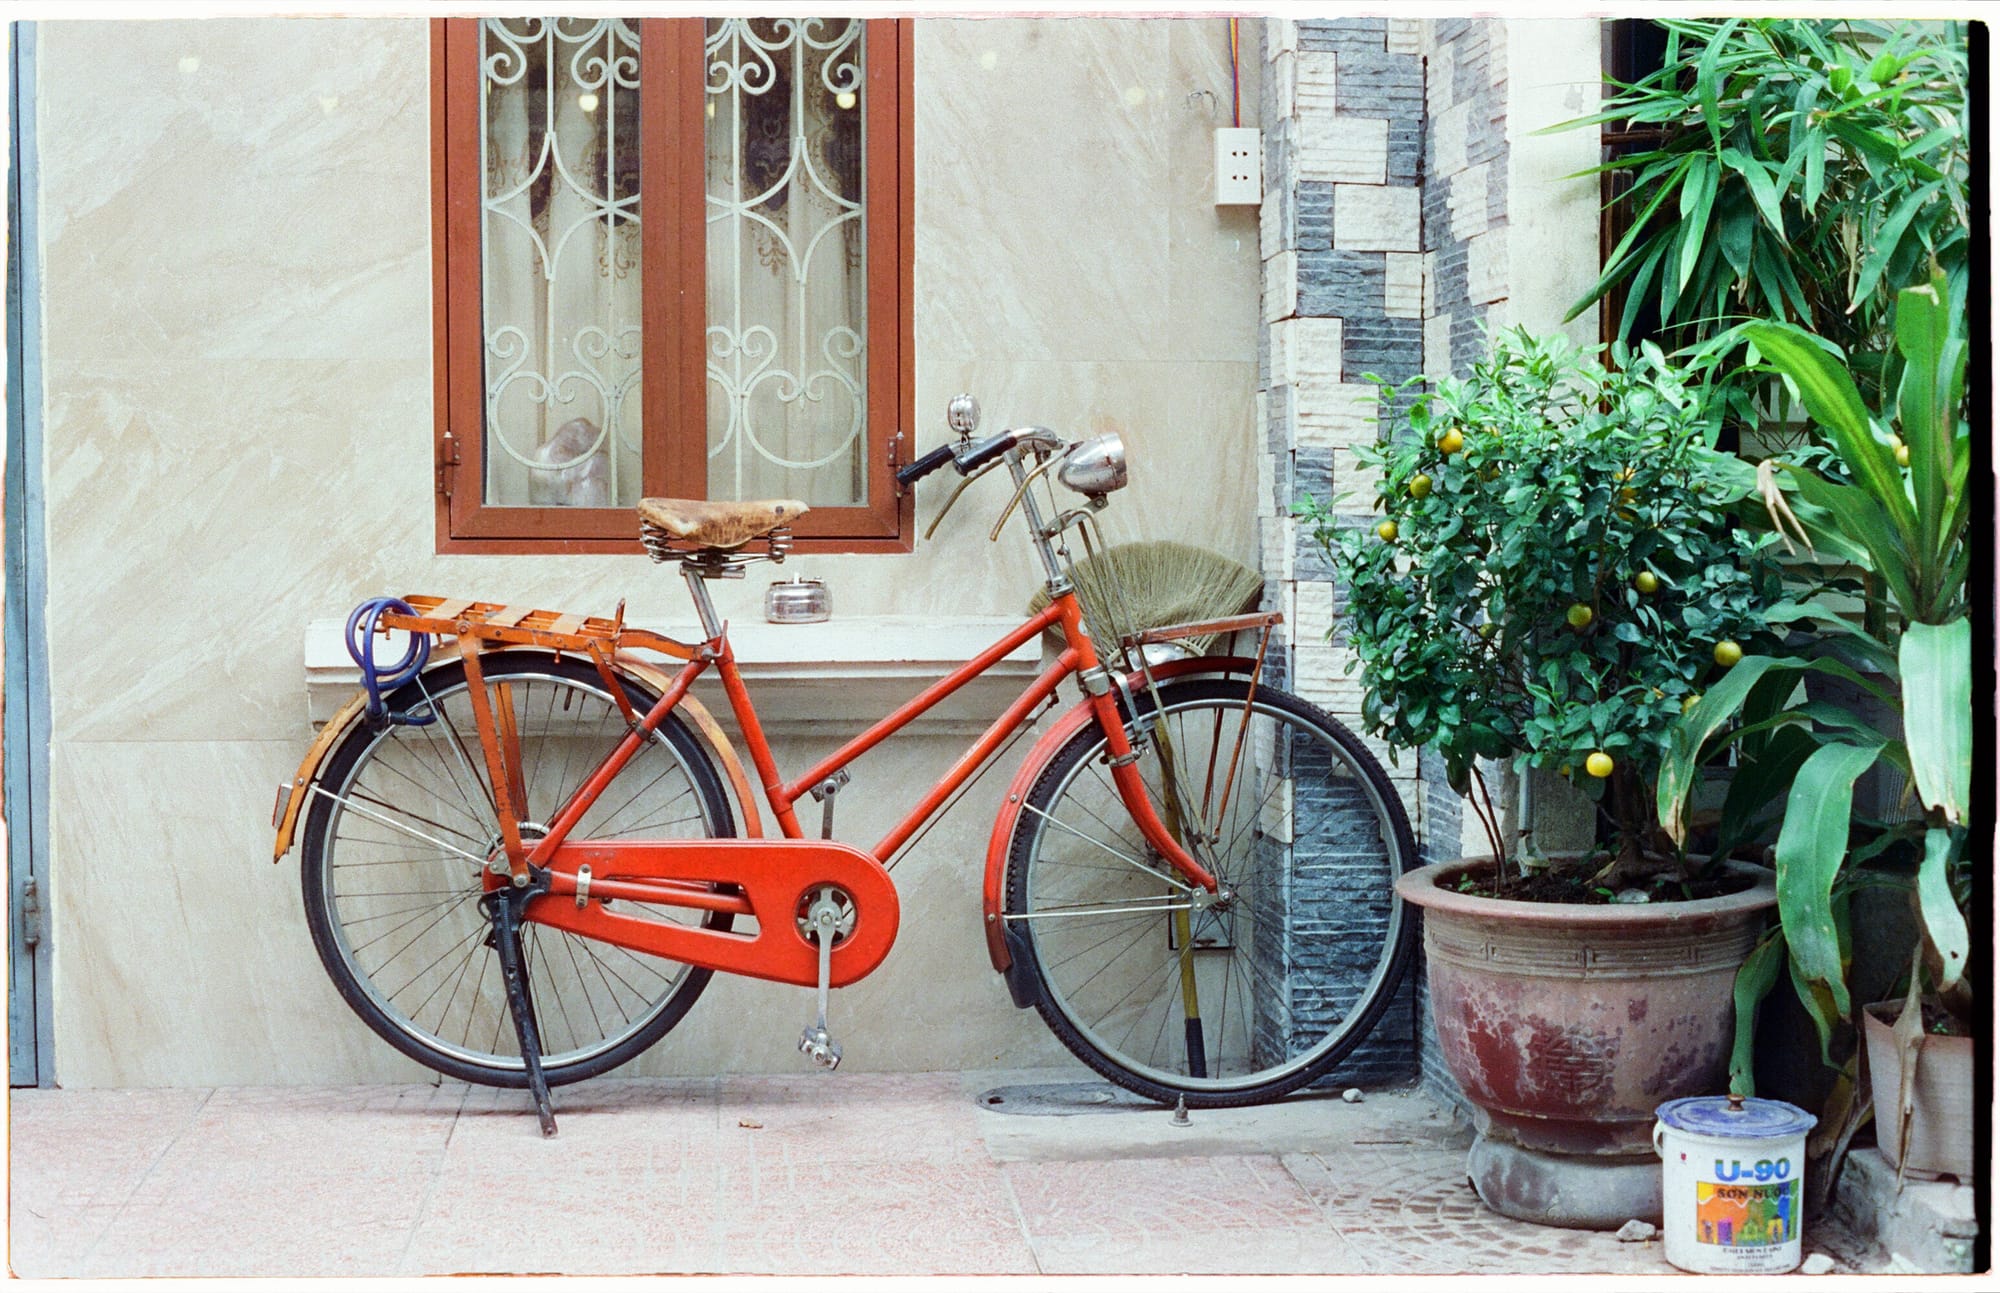
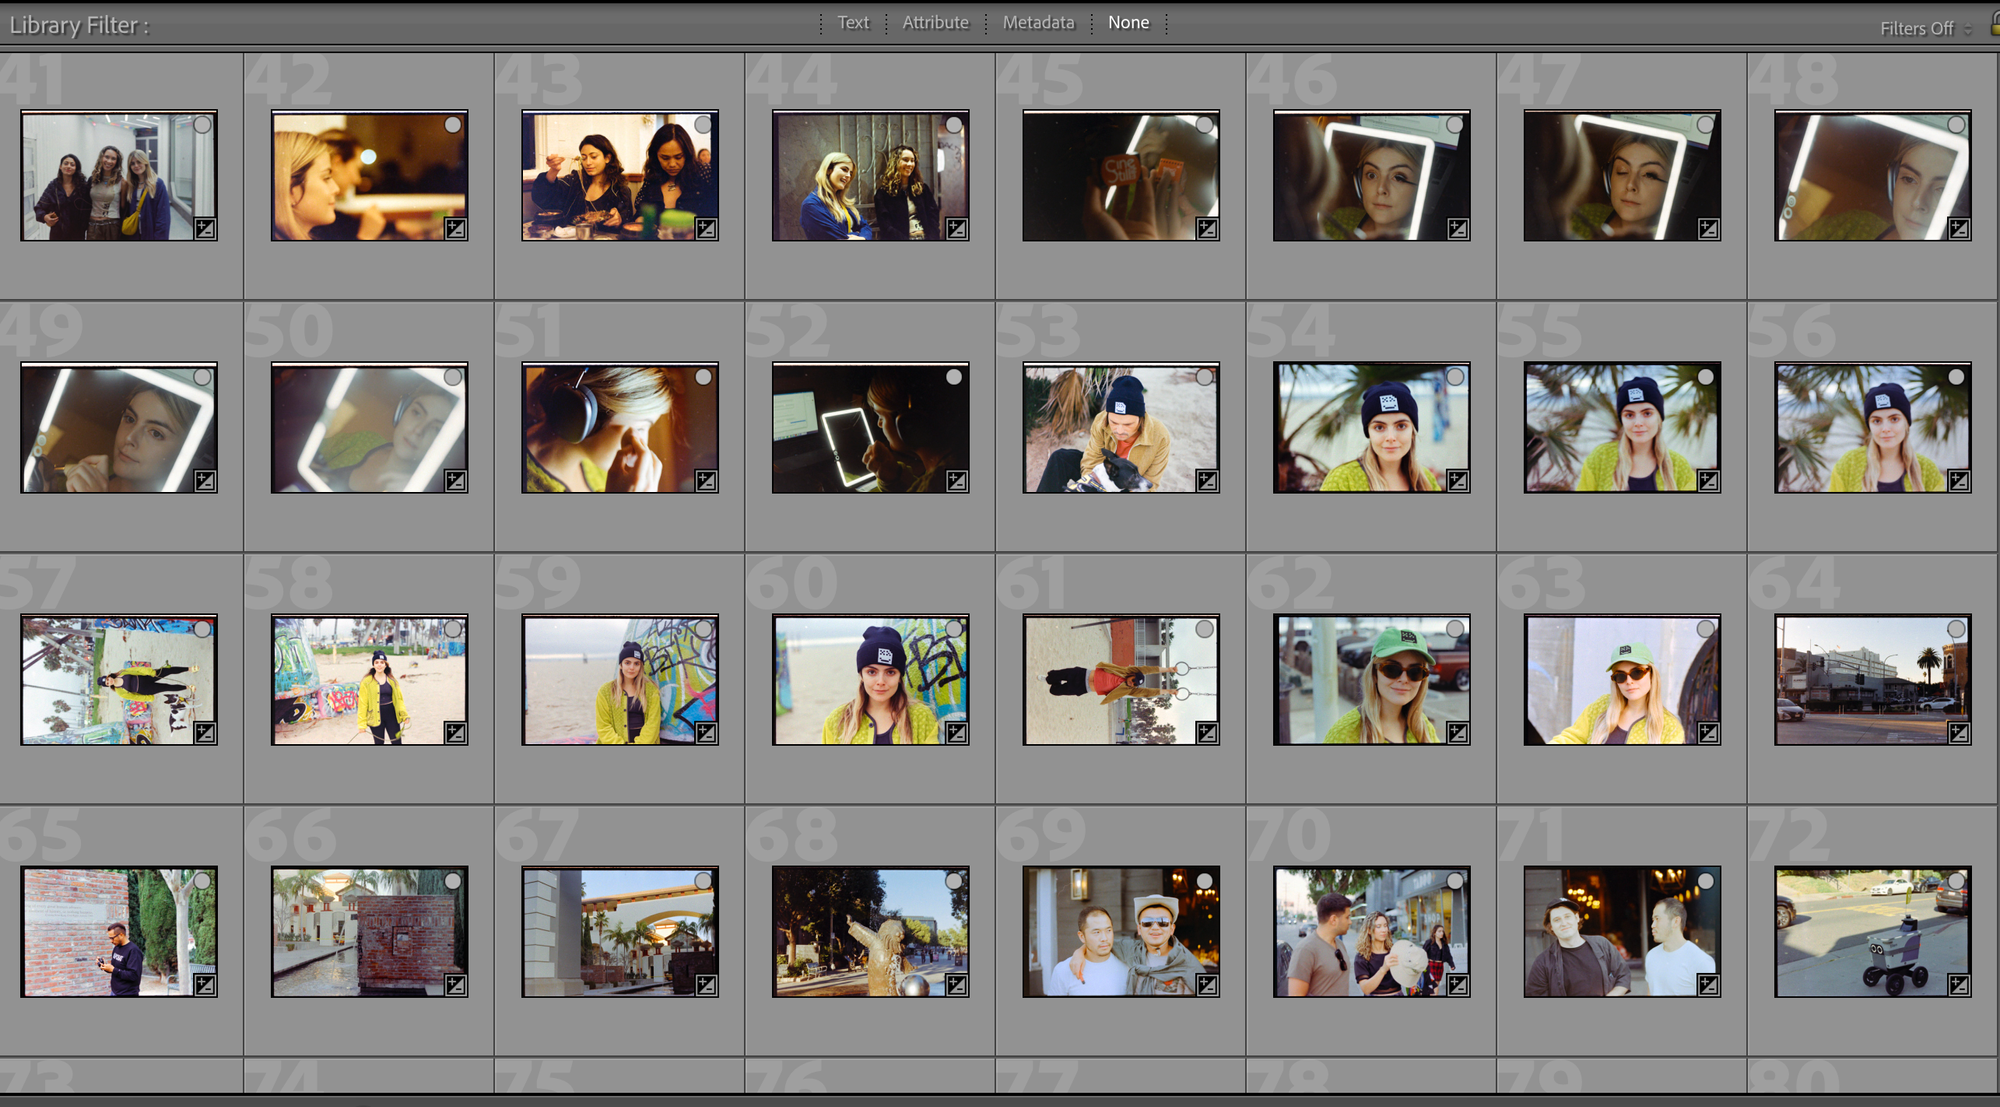
Some images I have developed myself. Each time I develop film I realize a new mistake I've made, and have been getting sharper results more recently.
Developing: Is It Fun?
Here’s how you develop film. You need to, in the bag, get your film onto the aforementioned reels, then you need to put those reels into the developing tank. You have to do this totally blind, because if light hits the film it will get “fucked up,” to use a technical term. This can either be very easy or very hard, and having now done this 20 times (admittedly not a lot), I have not figured out a rhyme or reason as to when it is easy and when it is hard. Pros and people who do this often do this in seconds in their sleep; I have done it in one minute and also in one hour, with lots of cursing and film mangling in between.
Anyways, you disassemble the developing tank and put it in the changing bag (it’s a few pieces that keep the light out, a top, and the two aforementioned reels). You put the scissors in the changing bag. You put the bottle opener in the changing bag. You put two rolls of film that you’ve shot in the changing bag. Then you zip up the changing bag. Then you stick your arms in. Then you say a prayer, use the bottle opener to pop the top off the film canister. Then you pull the film out, cut off the leader (the end of the roll) with scissors into little rounded edges, and attempt to put the film onto the reel. You do this by feeling around for the little notch where the reel “starts.” Theoretically you catch the film into this little notch and then you ratchet it back and forth until all of the film is uniformly wound around the reel. In practice I have found that it can seem like the film has gone onto the correct notch, but it possibly has not because the film either doesn’t ratchet properly, or it DOES ratchet properly and then eventually gets stuck or jammed or mangled in some way before the end of the roll. This is, easily, the most frustrating and demoralizing part of the whole process and, though I have not cried while doing it yet, I have wanted to several times. I have zero tips for how to do this because as I mentioned, I am very bad at it, and I don’t know why I’m bad at it, because I literally cannot see what I am doing, what is going wrong, or how to correct it.
Once the film is on the reel (ha ha ha ha good luck), you do it again with another roll of film. Then you put those in the developing tank. Then you put the top on the developing tank. Then you are, mercifully, done with the part that happens in the dark.
Next, you develop the film, which is actually very easy but which requires you to follow very strict instructions. You should do this part in a sink, imo. You are supposed to wear gloves and eye protection for this part, but I have not and it seems fine. The way that you do this is you pour the developer chemical into the developing tank and then you “agitate” the whole thing every 30 seconds for a couple minutes (the actual time is very important and can vary, please follow the instructions), which means you turn it upside down and rightside up a couple times. Then you pour the developer back into the bottle (it is reusable), and you do the same thing with Blix, which is the second chemical you buy. Then you rinse the film under the faucet for a few minutes, though I will probably start using distilled water for the rinse because I have been getting mineral stains on my negatives. Then, you are done! Wow!
This entire process either takes 15 minutes or three hours, depending entirely on the getting-the-film-on-the-reel part.
It is at this point you take the film out of the developing tank and, if you see photos on the negatives, this means you have not completely screwed up. Thankfully, I have gotten real images each time I have developed film, even when I have mangled the negatives.
The next thing I do is put a push pin through the end of my negatives and hang them from the ceiling in my bathroom because this is what someone on YouTube told me to do and it has worked fine. You need to let the negatives dry for a little while—I have always left them overnight but you could probably let them dry for less time than that if you are daring.
A note on the chemicals: They denature over time, and the only way to know if they are still working is to continue developing film with them. So when the chemicals say they can process 24 rolls, that is just a guess, which is what the instructions themselves say. I used my first set of chemicals for about 10 rolls over the course of several months, and I didn’t like how the last set of rolls I developed with them turned out, so I got rid of the chemicals and bought new ones. Older chemicals basically lose their developing “power,” so you can still use them but need to keep the film in the developer for longer (by a couple minutes), which introduces yet another level of uncertainty and guesswork to the whole process.
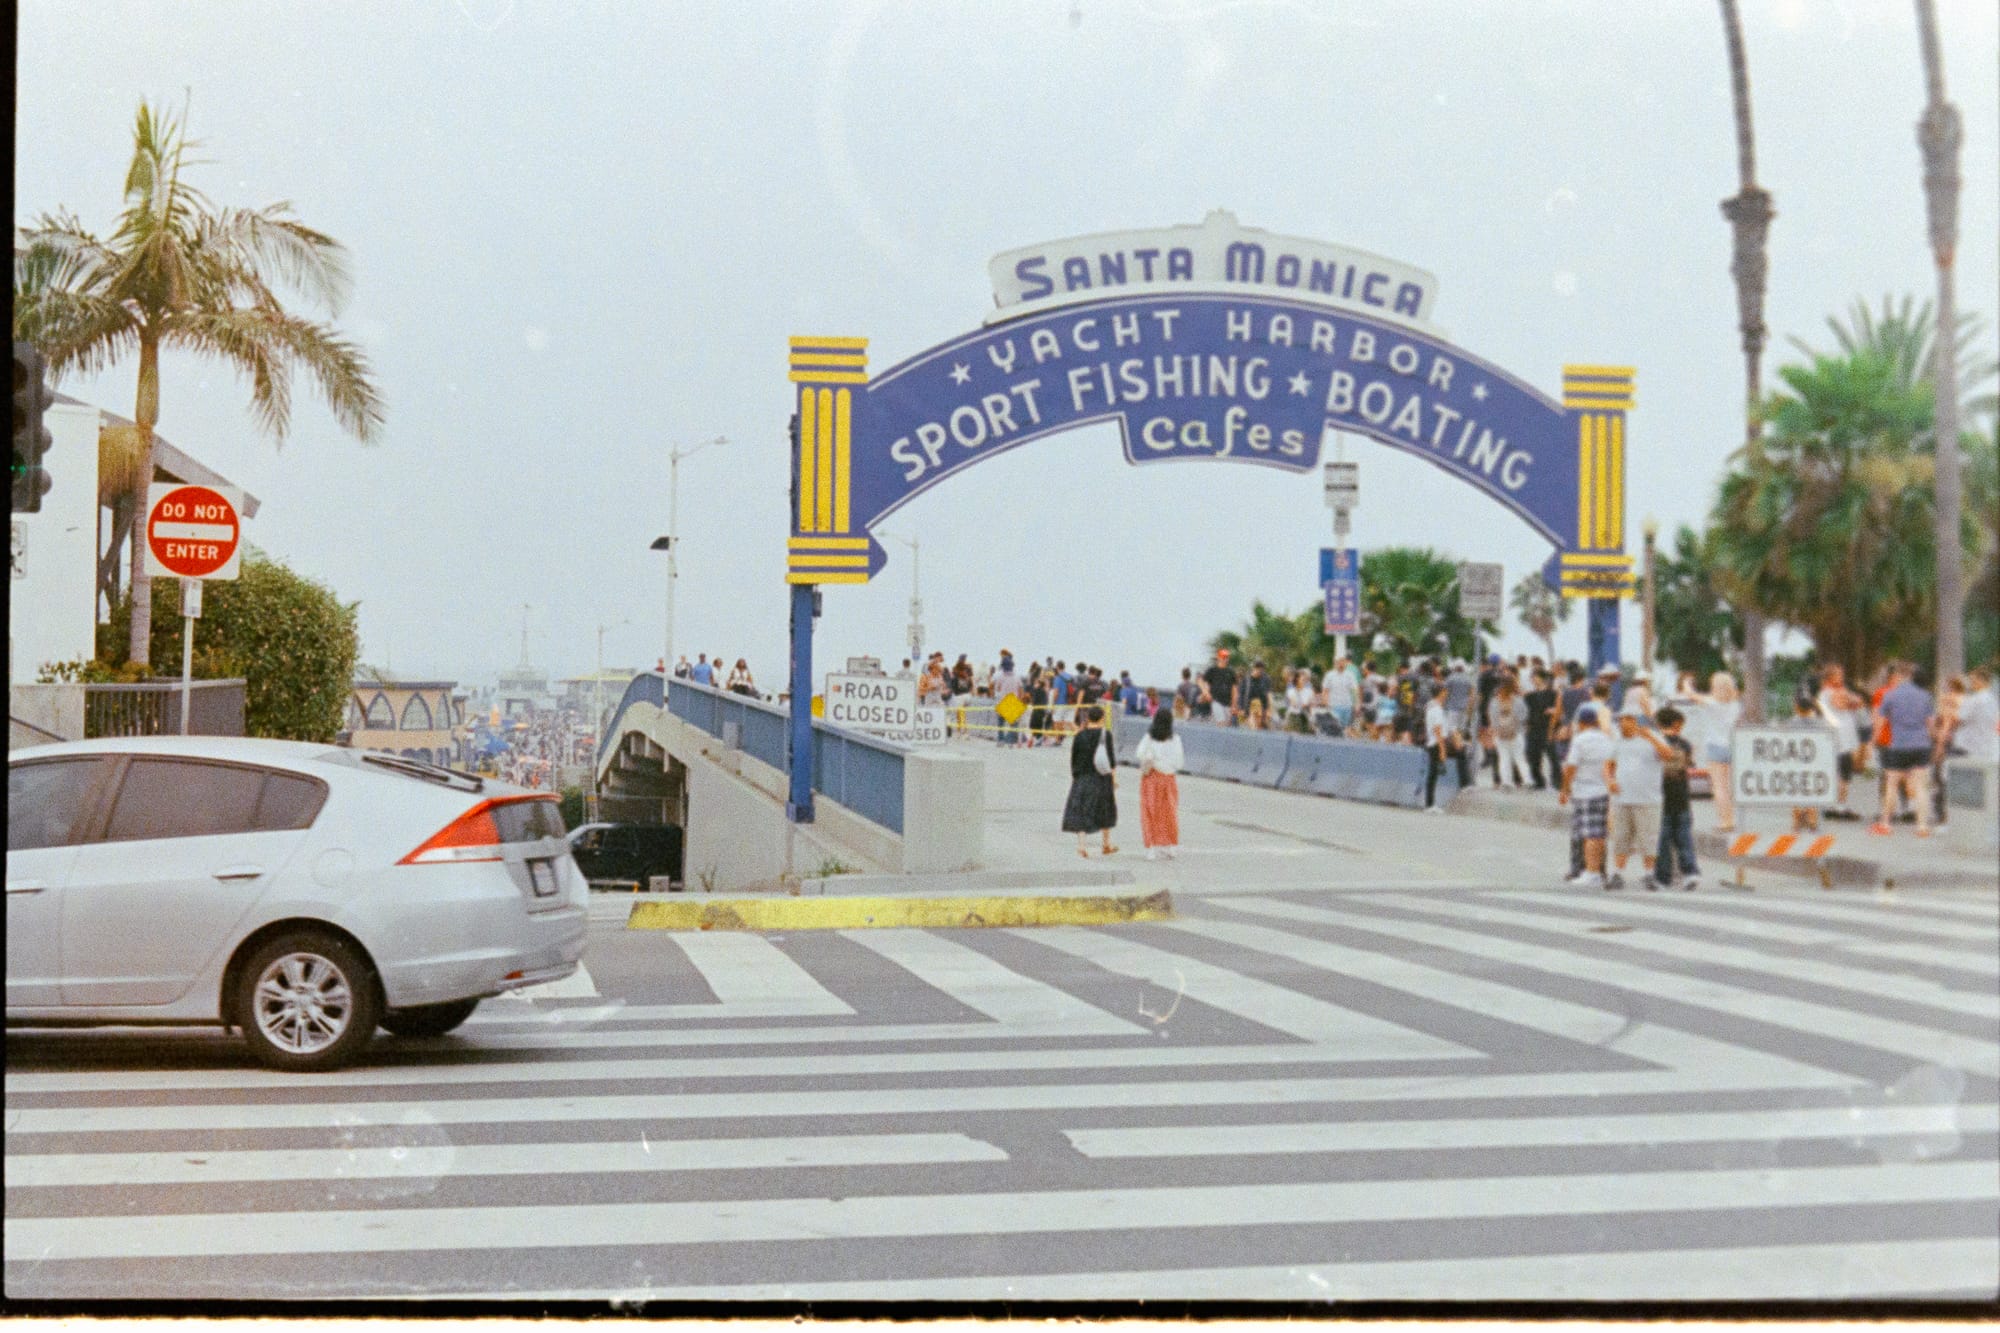
Images I got professionally developed have thus far been cleaner/crisper.
How to Scan a Photo Using a Handful of Expensive Gadgets:
Now the scanning, which turns the negative into an image you can post onto Instagram, thus making the whole endeavor worth it. You can buy a film scanner on Facebook Marketplace or eBay, which is probably the easiest, cheapest, and most sensible thing to do. I hear the Epson ones are decent, but I have no idea.
This is because I read one (1) Reddit comment that said that film scanners are a sucker’s game and that the better, more cool thing to do is something called DSLR scanning, which is where you take pictures of the negatives with a DSLR camera, which has the benefit of theoretically creating much higher resolution files but has the downside of costing a lot of money, being incredibly finicky, and driving me into abject madness. I chose this one.
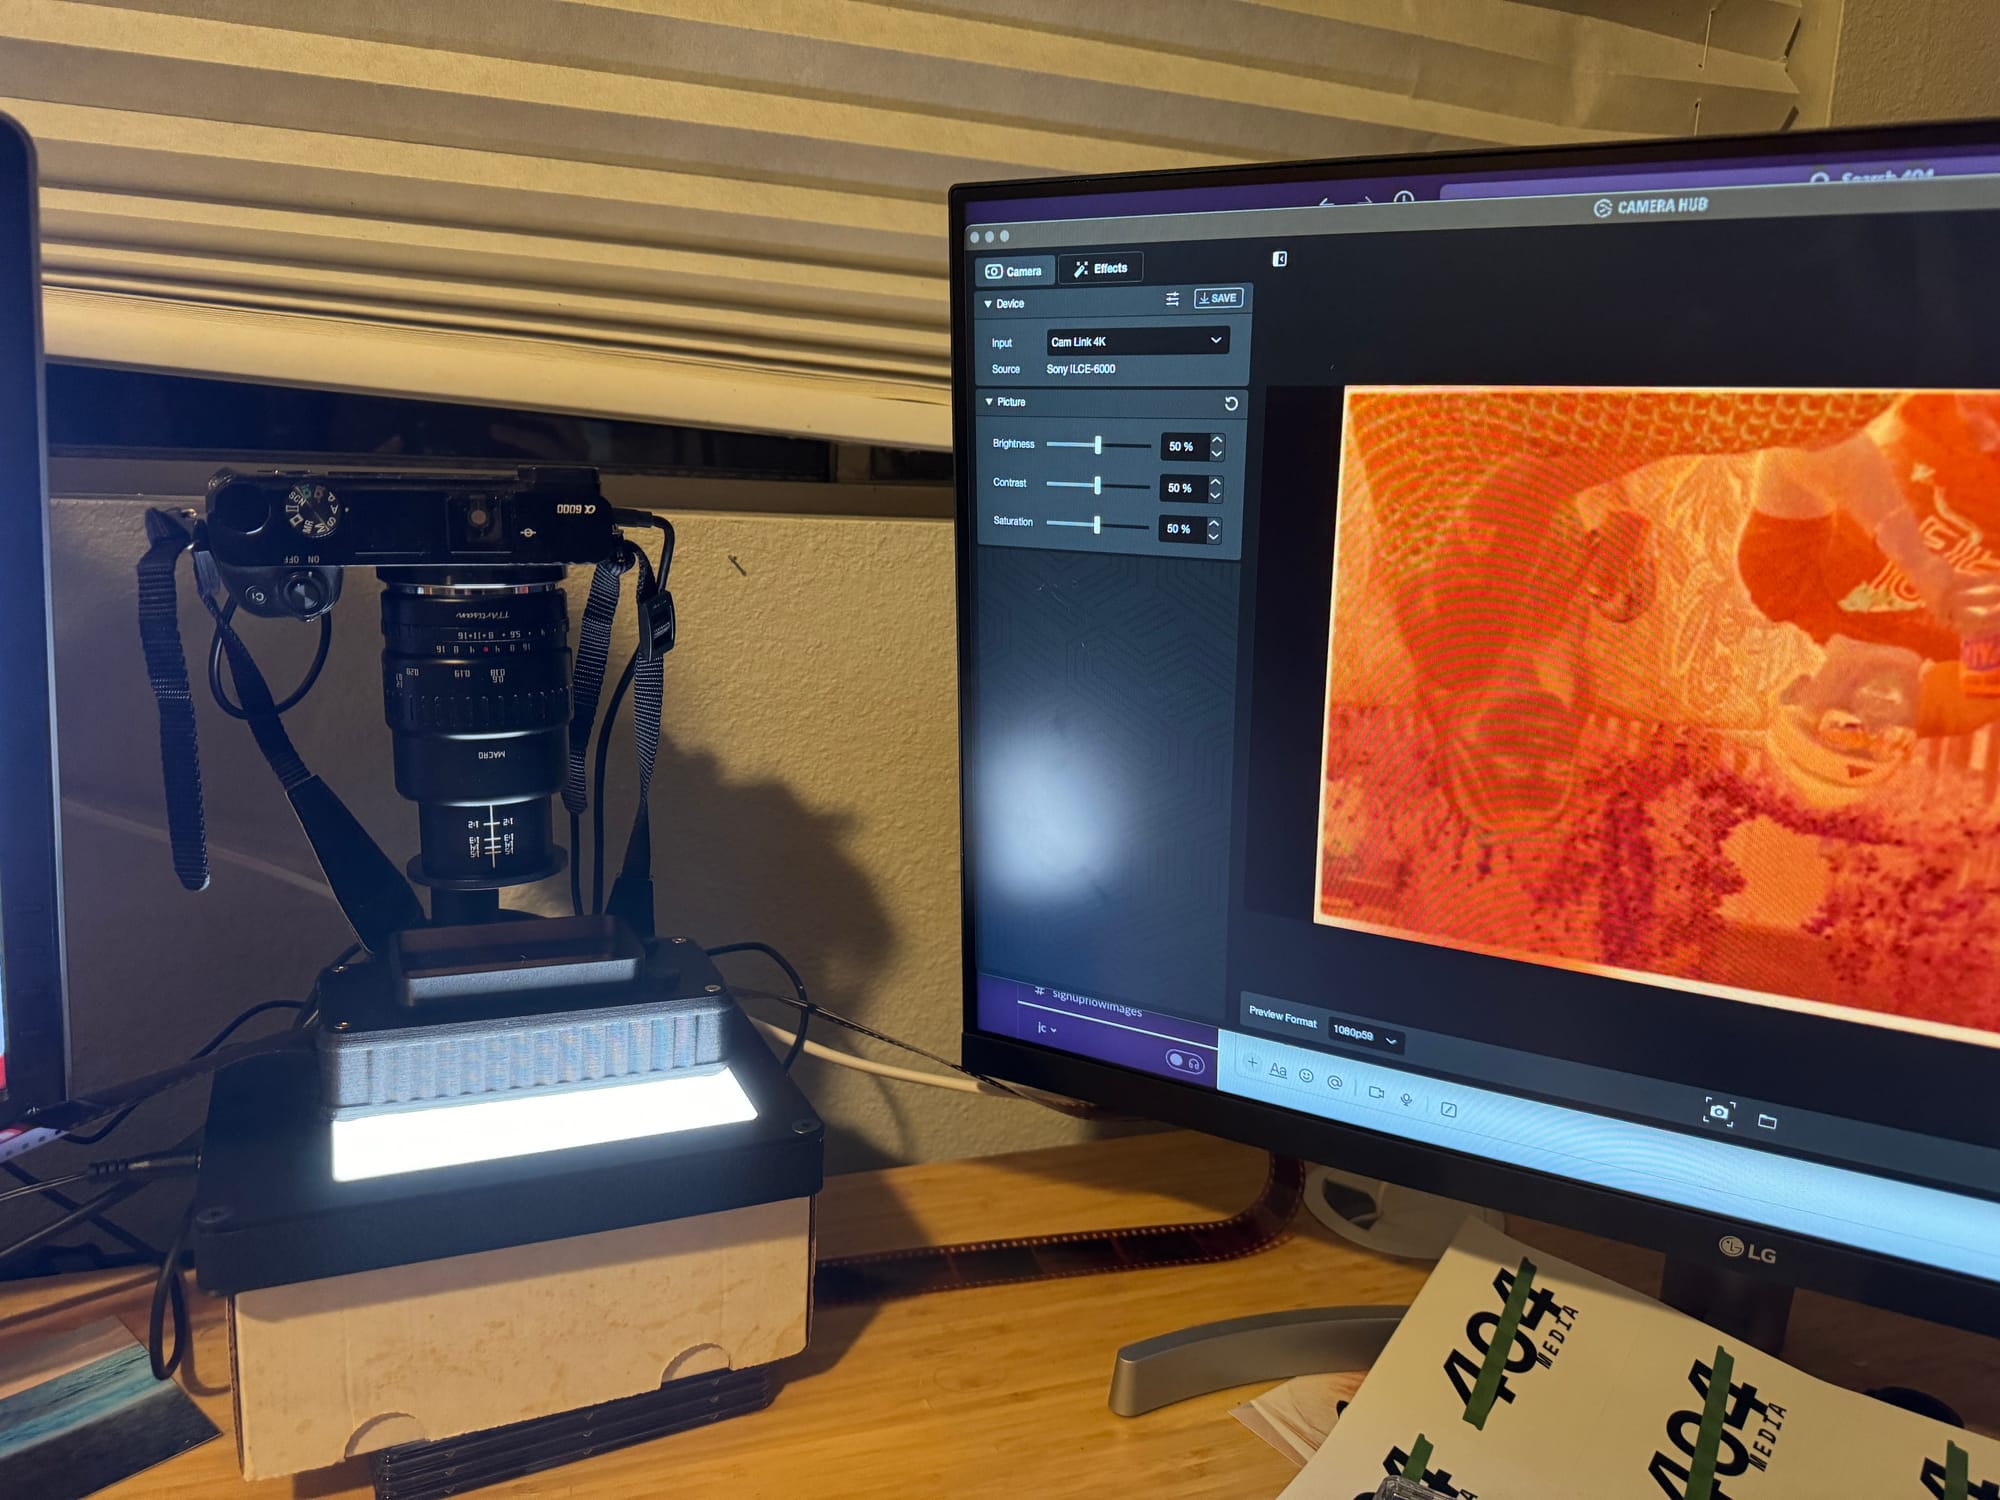
The theory here is that you need to shine light through the negative from the bottom, which is held in place with a carrier, and you take a photo of each frame of the negative from above using a macro lens as a RAW file, which you then process in Lightroom using a special plugin, which magically turns it into an image. It is both very complicated to get the setup exactly right and also very easy once you have nailed the setup.
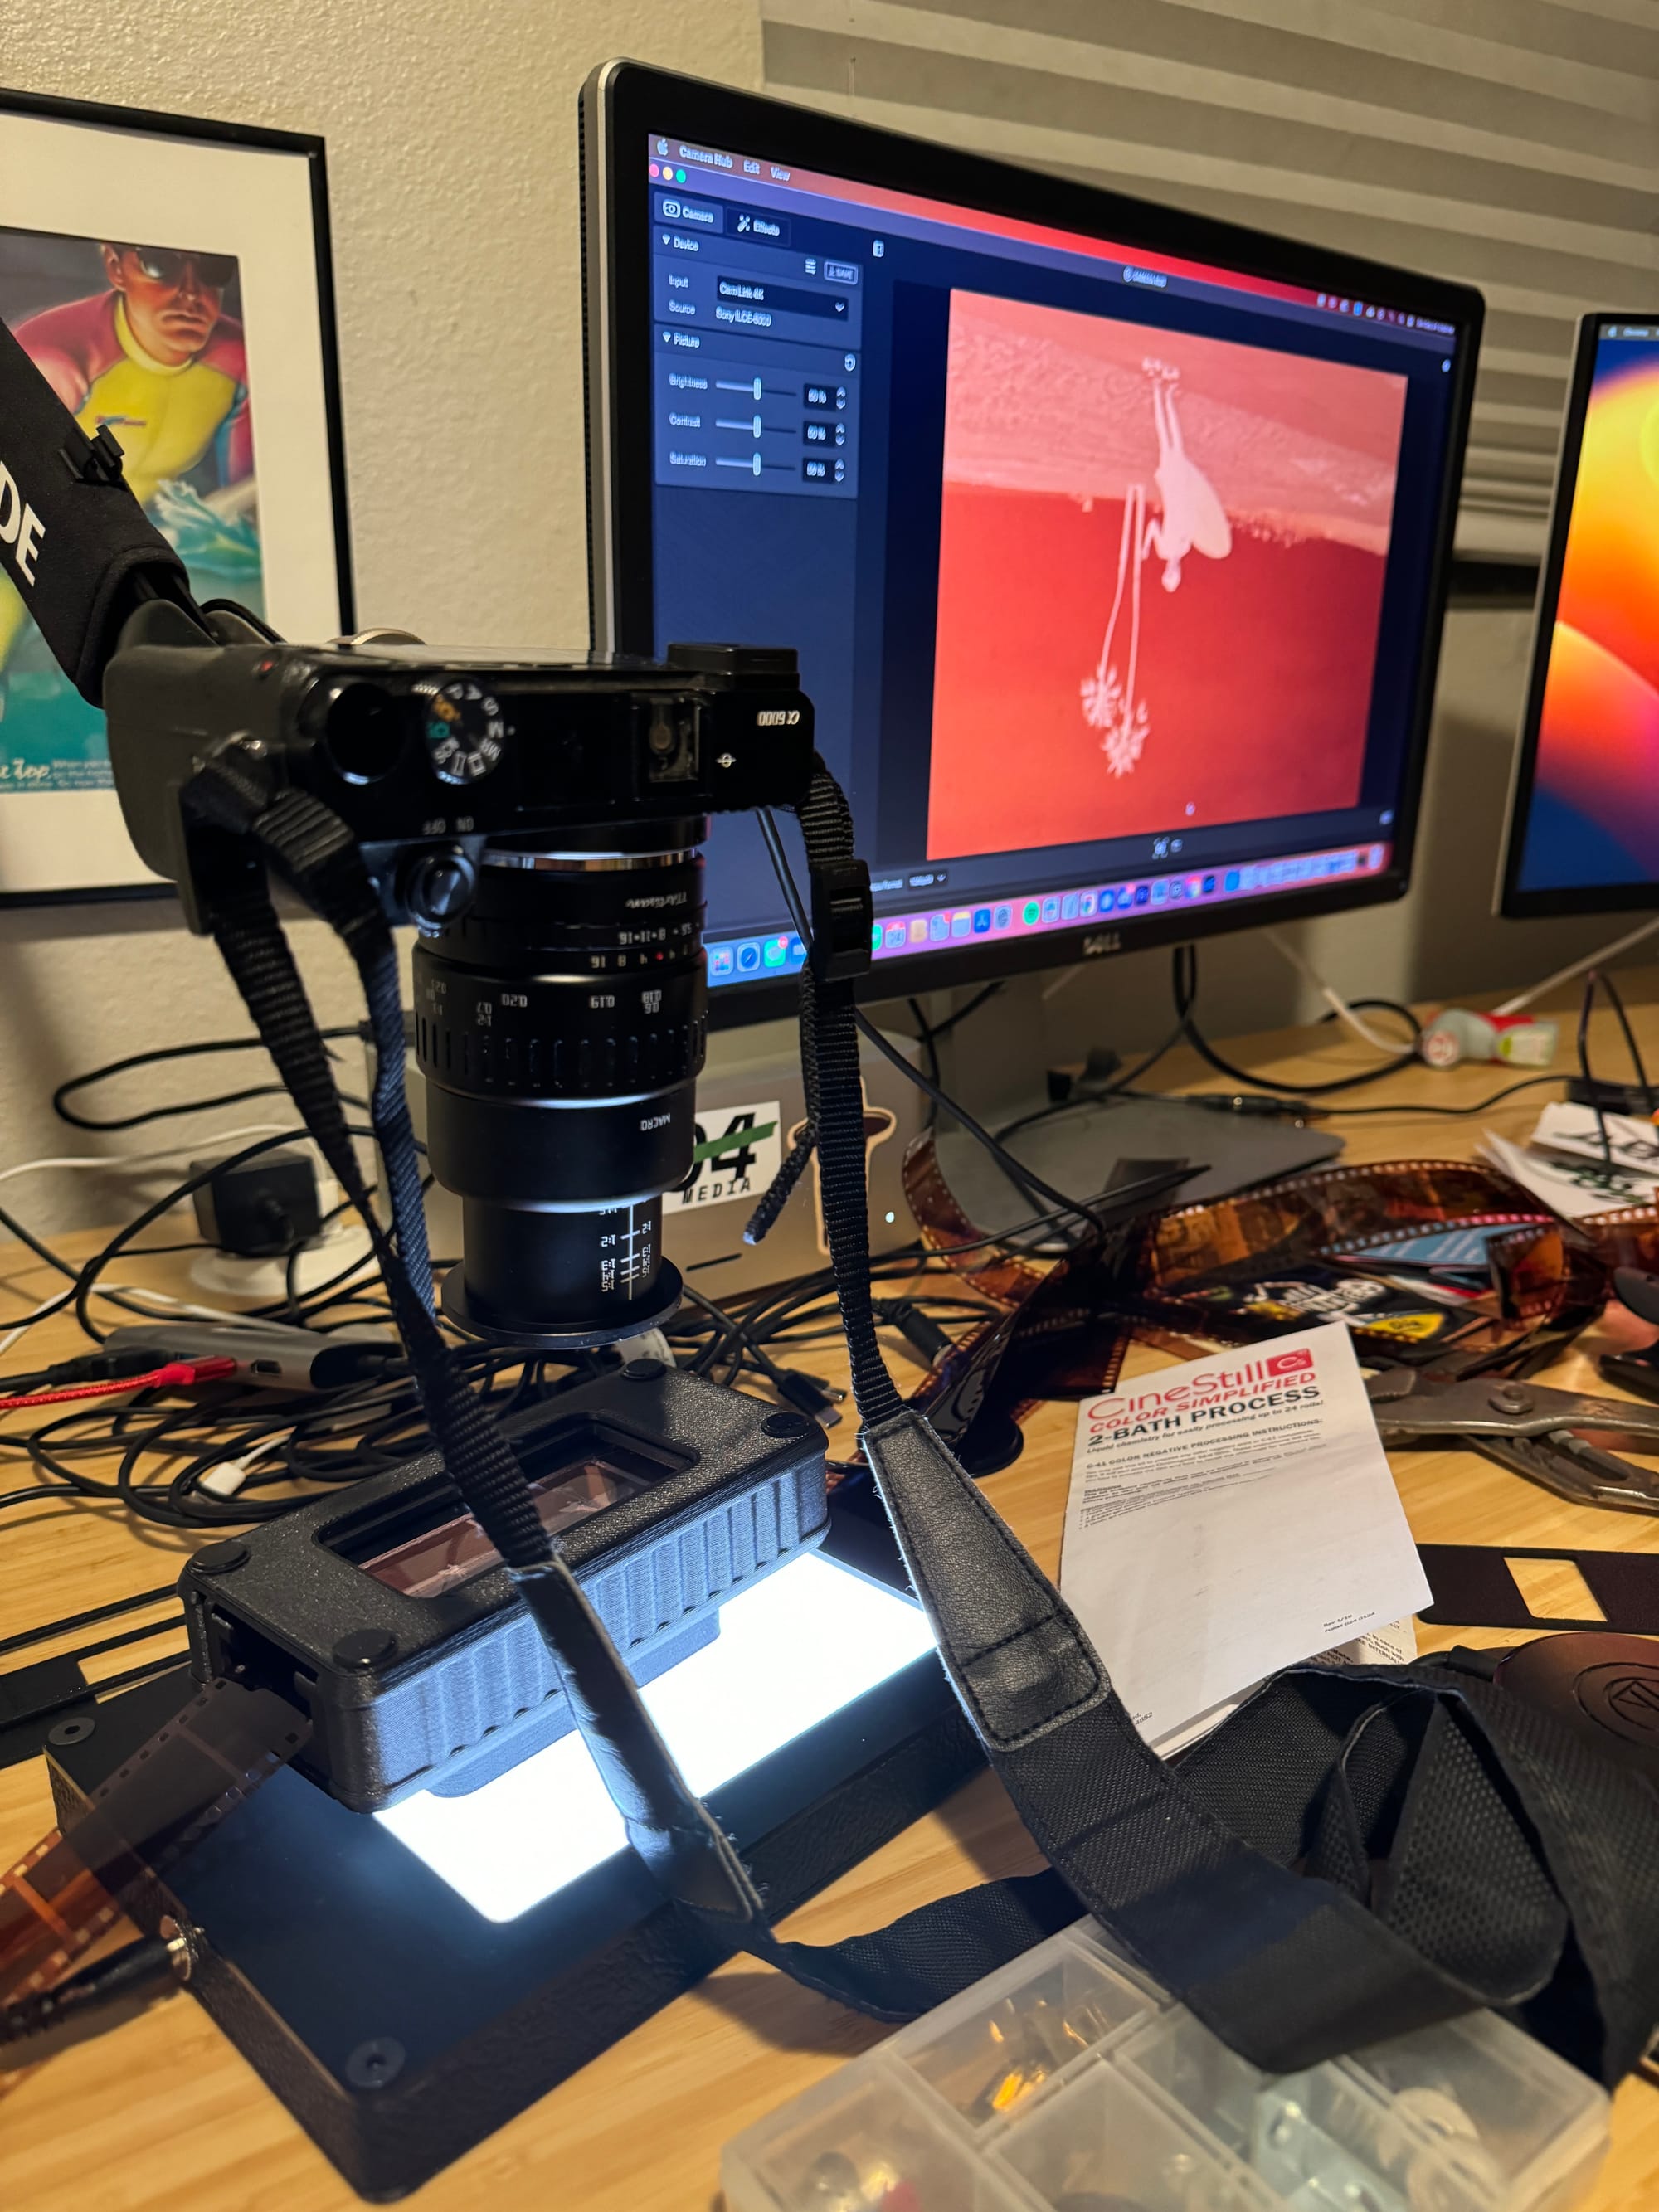

I justified going the DSLR scanning route because “I already had most of the stuff,” meaning, I had a Sony a6000 mirrorless camera and a podcasting microphone arm, which can be modified to hold a camera. Basically, you need to get the camera onto a tripod or other stable situation and get it to face down, directly above the negatives. I don’t think you can simply hold the camera, it needs to be stabilized in some way. Then you need a bunch of other stuff to make this viable, also. These items include:
A macro lens: Somehow this was not the most expensive thing I had to buy. I bought a $100 TT Artisan lens, which is a Chinese brand based in Shenzhen that is selling impossibly cheap, stylistically interesting, and not shitty lenses. They are probably going to be the subject of another article because what they are doing is very interesting. Anyways, you need a macro lens.
A negative holder: This holds your negatives flat and lets you easily advance the film to take pictures of each frame. I got this one from Negative Supply Pro, which specifically makes products for digital film scanning. It costs $70, though you can seemingly pay much more for one of these. It works well but if I’m being very honest, I really don’t understand why these things cost so much; they are obviously 3D printed for very little money but it’s a niche product with not that much competition.
A light source: I also bought this from Negative Supply ($129), but by the time I realized I needed it I had already bought literally every other thing I needed and was therefore stuck. You can spend an incredible amount of time researching the “CRI” of a light, what this means, and things of this nature, if you want to drive yourself crazy. You can allegedly use an iPad on full brightness with a white screen as your light source but I don’t have an iPad so I didn’t try.
A “copy stand,” tripod, camera arm, or some other way of stabilizing your camera: I already had a microphone arm that I then bought an adapter for to do this. Then, I got frustrated with it because my camera was heavy and bought an Elgato mount, which makes a good pole for cameras that I am happy with. You can also spend hundreds of dollars on this if you want to. You also need a way to fire the DSLR’s shutter remotely. It also helps if you can connect the camera to your computer so you can monitor the viewfinder through your computer’s monitor, which I also had.
Lightroom Classic: I already had this, but it is very expensive if you don’t have it.
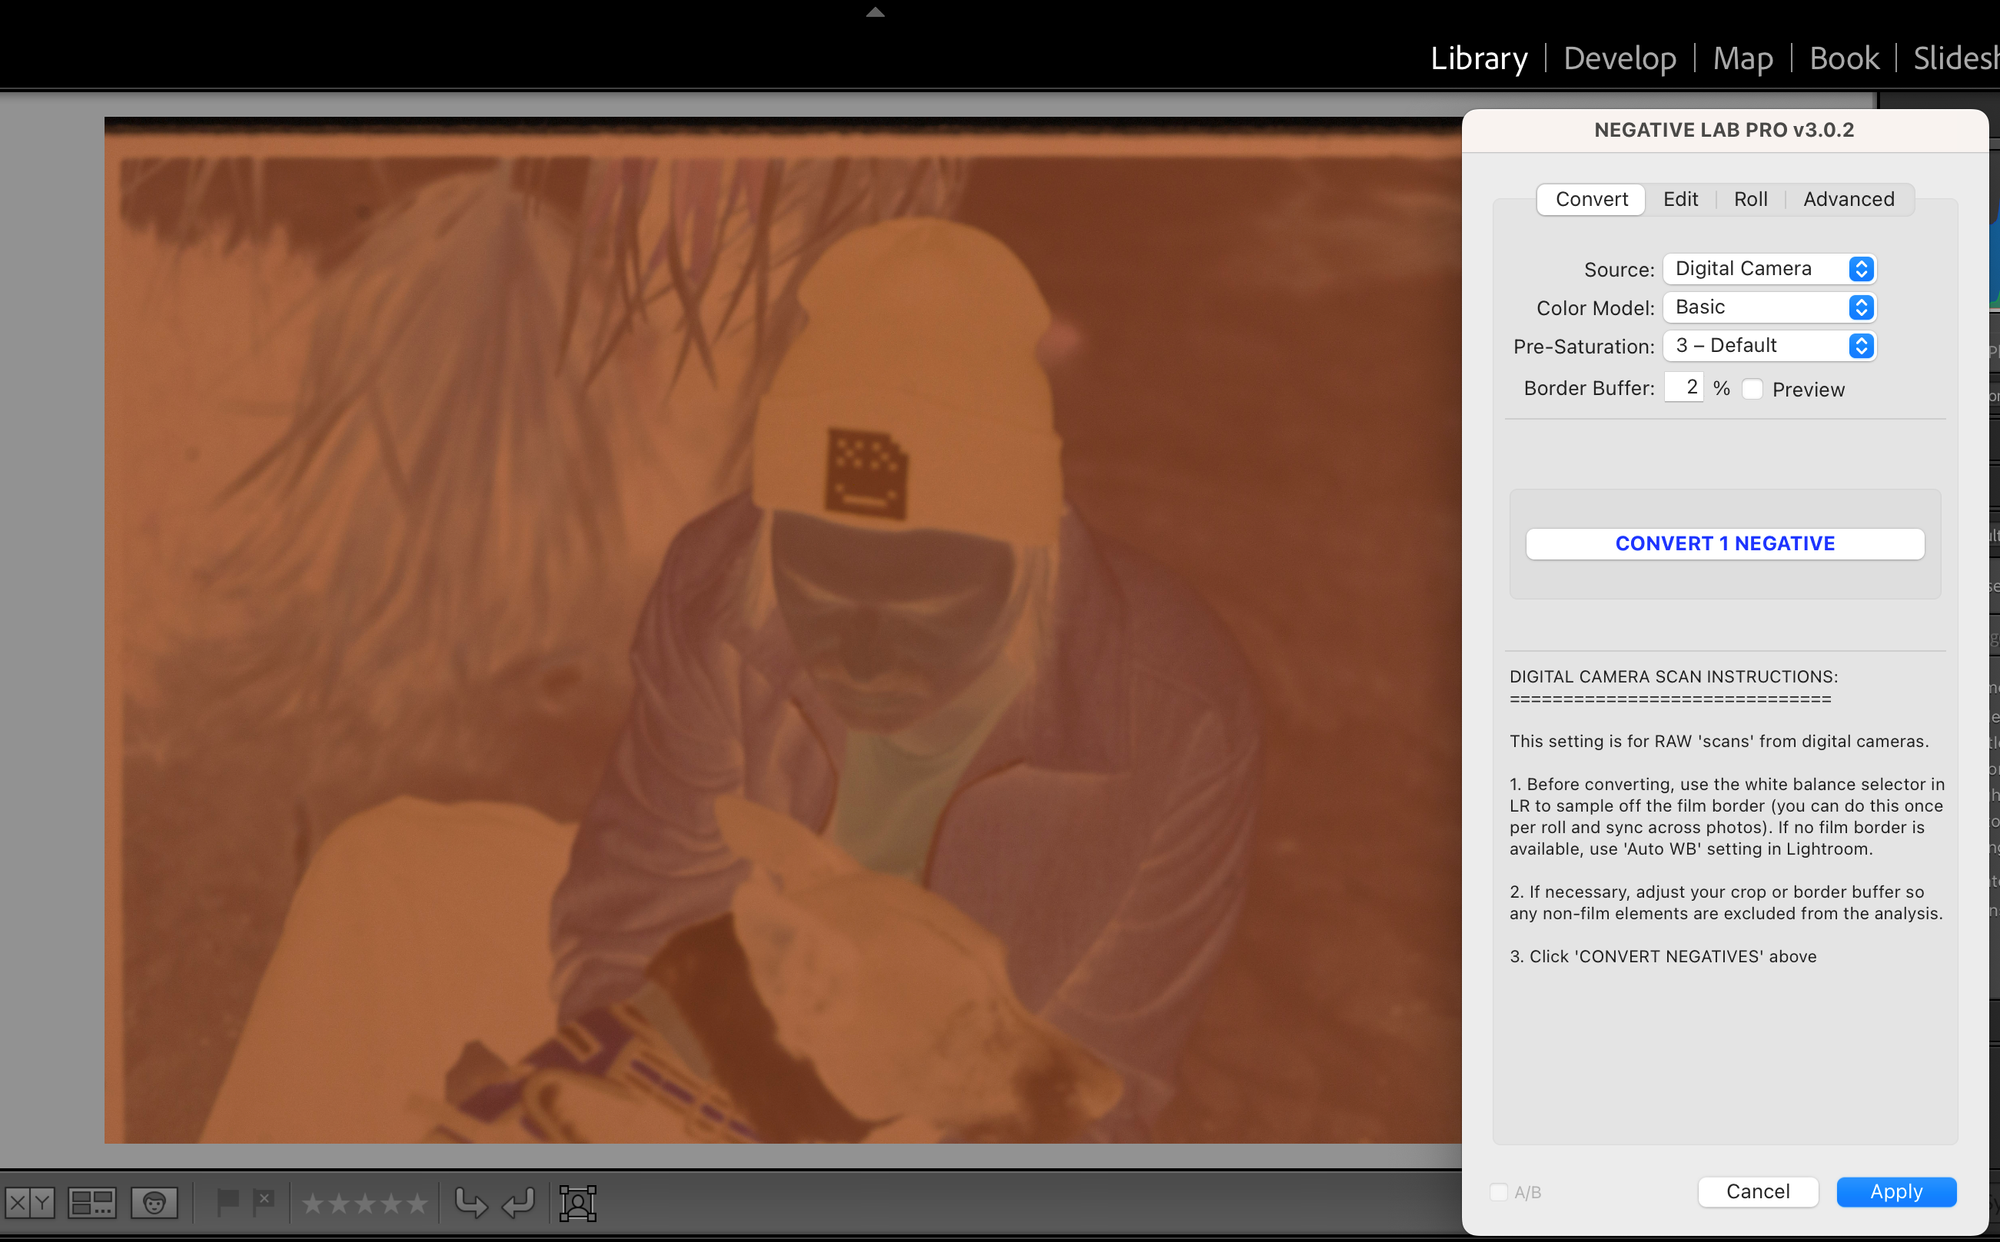
Negative Lab Pro: A plugin for Lightroom that costs $100, works well, and is by all accounts made by good people. This is nonnegotiable, you need it.
Scanning Process:
I have now written thousands of words about my very expensive fool’s errand to get to the main point of this article, which is the conversation I had with my dad. I am an amateur, beginner, idiot film developer and scanner and therefore I am getting results that are wildly inconsistent for reasons that I don’t fully understand. I have turned some rolls of film into images that are sharp, well-exposed, and that I am very happy with. I have also turned some rolls of film into images that are blurry and which drive me crazy, and I don’t know why. Like many hobbies, you can spend an incredible amount of money buying top of the line stuff and spend a huge amount of time researching how to perfect and tweak each aspect of this entire process.

The frustrating and thrilling thing about film photography is that, while there are several ways to do process-of-elimination to figure out why things turned out the way they did, the camera is capturing light at a specific moment in time that you can’t get back, and I haven’t yet reached a level of obsessiveness where I am tracking the specific camera settings of each photo I took. I have gotten a handful of rolls processed at professional labs, and they have turned out much better than the ones I’ve done at home. This suggests to me that I need to improve my developing and scanning, and that I am more or less doing a good job when actually taking the photos. I can further narrow this down by taking negatives I have developed and having them scanned by a pro, to see if their scans are better than mine. Or I can take negatives developed by a professional lab and scan them myself, and compare and contrast. I haven’t done this yet.
For that reason, I’m still not sure where I’m going wrong, but I am guess-and-checking with some positive results. An early roll of film was blurry because I was pushing the button on my digital camera to take the photos, which introduced a tiny amount of shake to the digital “scans,” and made the images look blurry even though the negatives weren’t. I got a remote for my camera (another gadget!), which has fixed this.
DSLR scanning introduces all sorts of things that can happen, though—I have to focus the digital camera’s lens, and select an aperture and shutter speed for the digital photo, which means I have a whole other set of parameters to think about. Then, in Negative Lab Pro, there are any number of settings and processing you can do to any individual photo, which I hadn’t even deigned to think about until my most recent development session, which yielded slightly better results. I’m learning!
In Conclusion:
I have obviously (obviously!) not saved any money yet by doing this myself at home. I have spent many hundreds of dollars to develop about 20 rolls of film at home, and have achieved results that I am both amazed by and also frustrated with. The amazement comes from the fact that any of this actually works at all, and the knowledge that I am trying my best and having fun. The frustration comes from the blurry photos. It’s all part of the process, I guess.